Creating a CyberArk (now Idira) Privileged Session Manager connection component for a web application

After helping someone in a CyberArk Discord that I frequent with correctly identifying a button as part of a Privileged Session Manager connection component for a web application, I realized that I've never made a connection component or a CPM plugin for a web application myself.
From experience I have from 'previous lives', I have already worked with the Document Object Model (DOM) and Selenium -- both used by the PSM and CPM web application frameworks -- so the fundamentals are already familiar but I've never done it in the context of CyberArk (now Idira).
In this post, we will develop a Microsoft Edge-based PSM connection component for the web application Shopizer -- an open-source eCommerce platform that is available as a container so we can focus our time on developing the connection component.
Understanding what a PSM connection component for a web app is doing
Before we start thinking about creating a PSM connection component for a web app, it makes sense to understand how they work.
The CyberArk Web applications for PSM documentation does not explicitly explain how they function but reviewing the page gives us important hints: the need to have the proper (Web)Driver for the browser and the syntax and examples for defining Web Form Fields.
What is a driver and what does it do? A (Web)Driver ".. is a remote control interface that enables introspection and control of user agents. It provides a platform- and language-neutral wire protocol as a way for out-of-process programs to remotely instruct the behavior of web browsers. Provided is a set of interfaces to discover and manipulate DOM elements in web documents and to control the behavior of a user agent."
We can extract another hint from the description of a WebDriver: the DOM or Document Object Model. The DOM "... is a programming API for HTML and XML documents. It defines the logical structure of documents and the way a document is accessed and manipulated. ... With the Document Object Model, programmers can create and build documents, navigate their structure, and add, modify, or delete elements and content."
From the information we gleaned, we can assume that the PSM uses a WebDriver to identify and interact with elements in the DOM. It will inject usernames and passwords into input fields, click buttons to submit forms, and read resulting DOMs to perform validations to determine if the login was successful or not. The connection component's WebFormFields property is how we instruct the PSM to identify elements and what to do with them.
Identifying elements in the DOM
We can tell CyberArk to identify elements in the DOM several ways: using the name, class, text, or XPath. XPath can be used to navigate through elements and attributes in an XML document. XPath can also be used with an HTML document.
Explaining HTML elements and XPath is outside the scope of this post however let us quickly see the multiple ways we can identify elements in a connection component's WebFormsField using its syntax with a simplified DOM:
<html>
    <form>
        <input type="text" id="i_username" name="username" class="input_field" placeholder="Enter your username"/> <br>
        <input type="password" id="i_password" name="password" class="input_field" placeholder="Enter your password"/> <br>
        <input type="submit" id="s_login" class="submit_button" value="Login"/>
    </form>
</html>
Identifying elements with id, name, class, or text in WebFormsField
With the above DOM as an example, we can identify the elements in our WebFormsField effortlessly. Identifying by the elements' id and name, it would look something like:
i_username > {Username} (SearchBy=id)
password > {Password} (SearchBy=name)
s_login > (Click) (SearchBy=id)
We can mix and match what we search by. Depending on the elements, it may lend itself to one way or the other.
Identifying elements with XPath in WebFormsField
We can accomplish the same as we did purely with XPath:
//*^[@id="i_username"^] > {Username} (SearchBy=XPath)
//*/form/input^[2^] > {Password} (SearchBy=XPath)
//*^[@class="submit_button"^] > (Click) (SearchBy=XPath)
With XPath we can use the same identifiers as we previously had and do not need to specify element attributes at all like in the case of the password field -- which could be useful if an element we are working at has attributes with dynamic values or cannot be defined uniquely by it's attributes.
Note: The way we defined the XPath for the password field is not recommended. It is simply selecting the second input element on the page. If the page is later updated and an additional input is added before the two existing ones (for example: a search field in a header of the page) then our password field is no longer the second input but rather the third.
Creating our Shopizer connection component
With a better understanding of how PSM connection components for web apps work and how we can identify DOM elements in the WebFormsField, the creation of the connection component should be pretty straightforward.
Shopizer offers two portals: a customer-facing one and one meant for administrators. We will create a connection component for the Shopizer administrator portal.
With our local Shopizer containers running, a local test Shopizer administrator user account created, and our PSM equipped with Edge, the Edge Driver and the latest Secure Web Application Connectors Framework, let's create our first connection component for a web application.
Creating a new web connection component
As instructed in the Configuration part of the documentation, we first need to clone the PSM-WebAppSample and change the Id of it. We will set PSM-ShopizerAdministrator as the new Id.
Under Target Settings, we set the ClientApp to Edge.
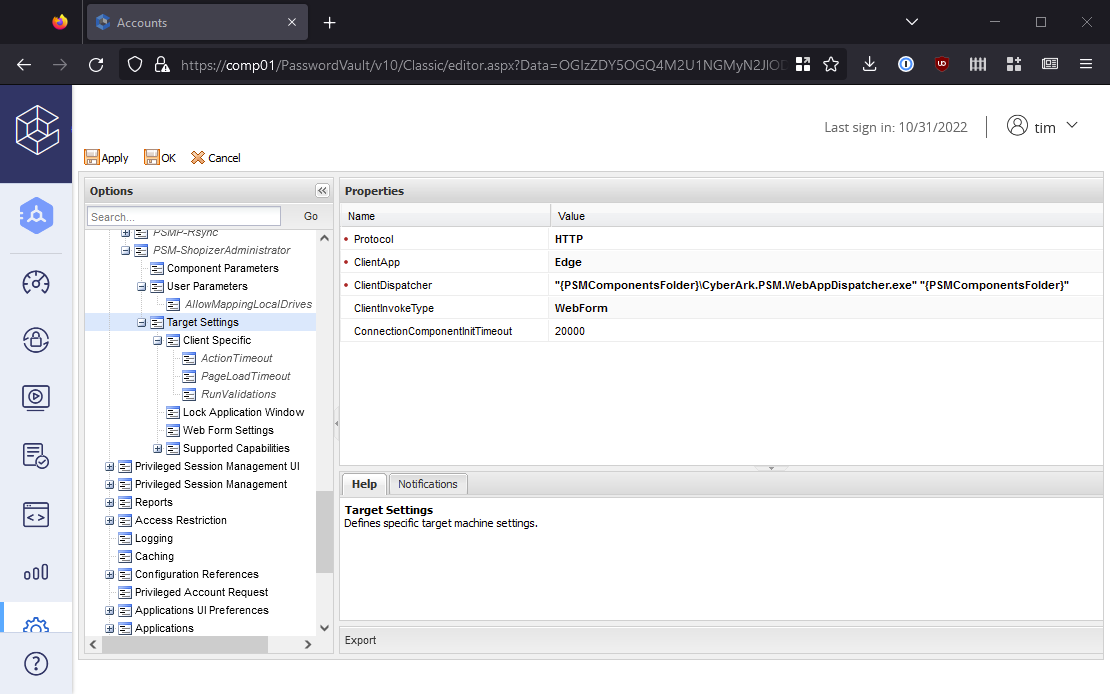
Under Client Specific, we add new two new parameters: BrowserPath and DriverPath. As we are using Edge, the paths are C:\Program Files (x86)\Microsoft\Edge\Application\msedge.exe and C:\Program Files (x86)\CyberArk\PSM\Components\msedgedriver.exe respectively. While in the area, we set the value for RunValidations to No -- this is something we should do later.
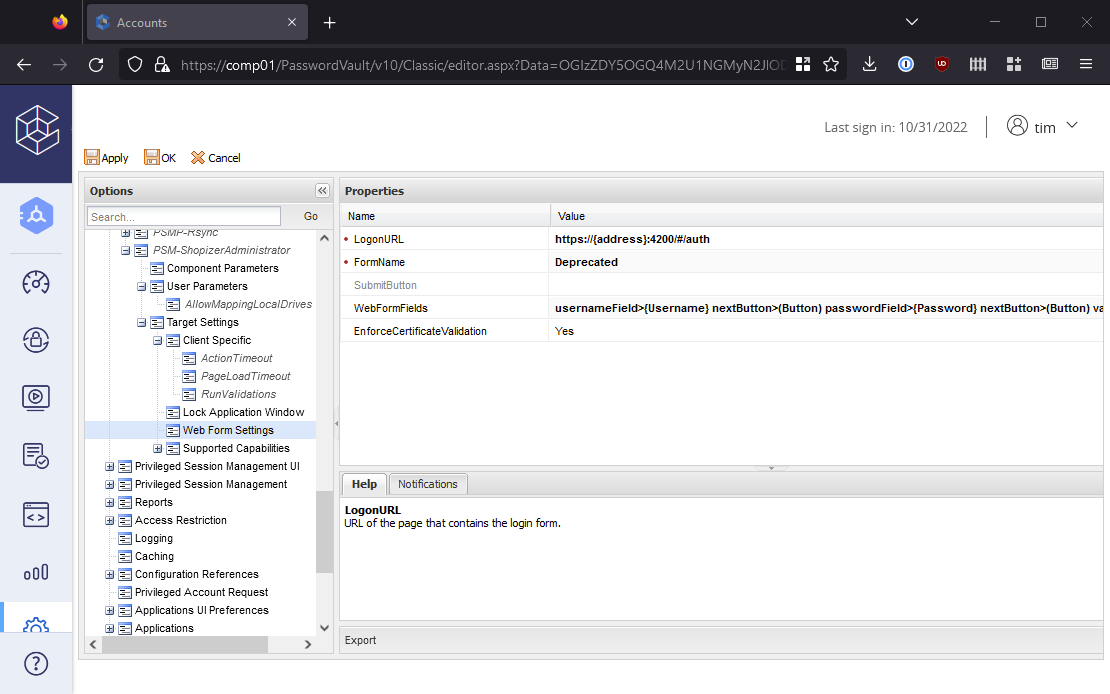
Then under Web Form Settings, we adjust the LogonURL to http://{address}:4200/#/auth. The administrator web interface runs on port 4200 and it would be better to add Port as a connection parameter but as we are not creating this for production use, we hard-code the port.
Defining our WebFormFields
The WebFormFields is the key to this connection component working. As we did in the example above, we need to define the username, password, and submit button elements.
But unlike in our example, we do not have the DOM clearly laid out in front of us so how can we identify those elements? This is when your favorite browser's Developer Tools come into play. I am using Firefox but other browsers have similar functionality.
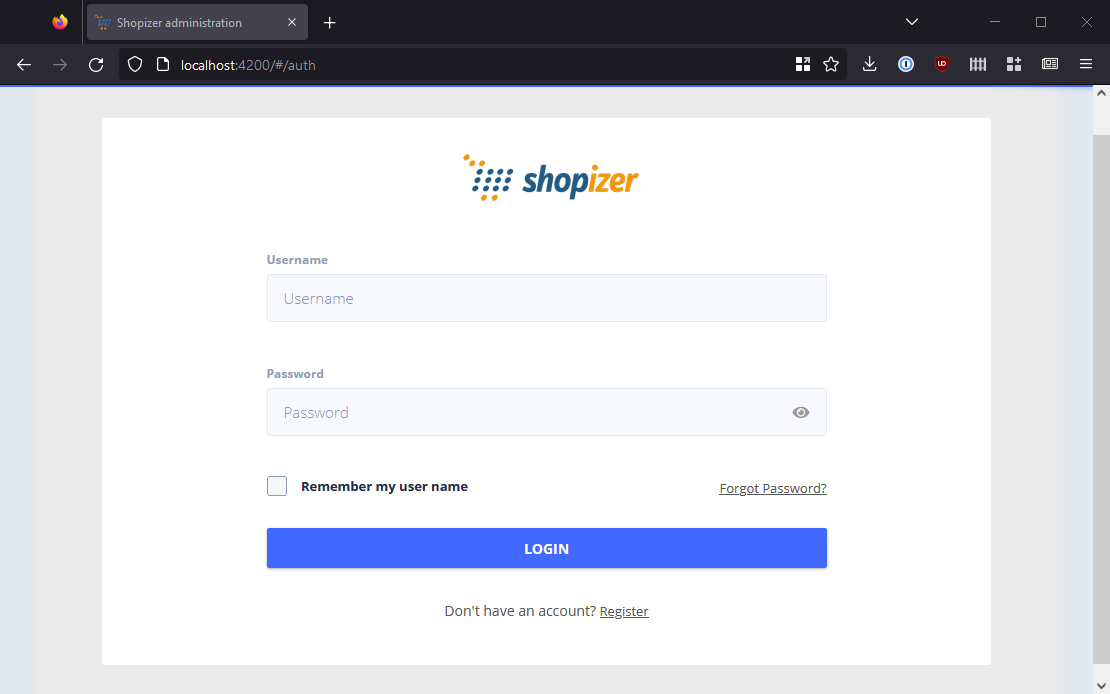
Assuming the Shopizer containers are running on your local machine, navigate to http://localhost:4200/#/auth and you should be greeted with the login page.
From there, we can right-click the username field and click Inspect to be brought directly to the element in the DOM. When we mouse over the element in the Inspector tool, the element is highlighted above in the web page.
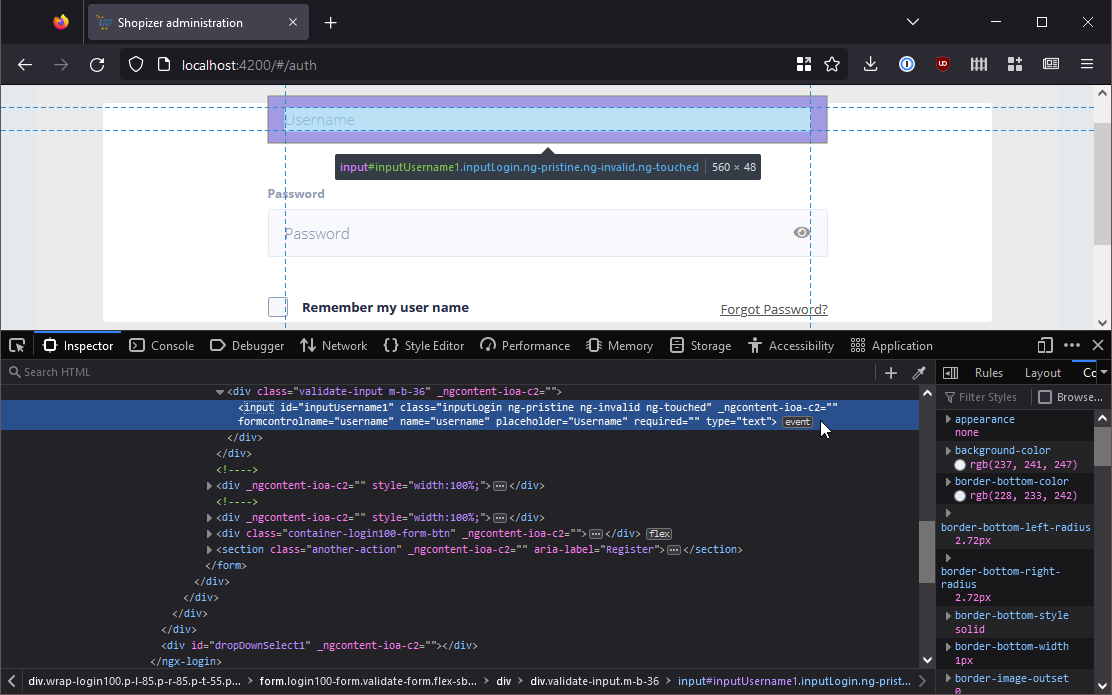
Now it is just about how we want to identify the input element that represents the Username field.
In addition to XPath, as the input element has an id, class, and name attributes defined, we can use whatever we want in our WebFormFields to identify the element. But which way is best?
Ultimately, it depends. As we are typically developing connection components for web applications we are not developing ourselves, we are at the will of the application's developers.
An element that has a class defined one day may not have it defined the next day if the site goes through a re-vamp. Some attributes may have values with random digits at the end giving us the clue that the attribute's values are not explicitly set and may be auto-generated with each deployment. XPath can be pretty resilient if our path expression does not include too many nodes.
For the username field of our Shopizer login page, we have a few options. The id and name values both look explicitly set and feel as if they have a relatively low risk of changing in the future. Let's go with name.
Back in our WebFormFields we update it to identify the field to input the account username using the attribute name with the value of username. We use Inspect in Firefox to identify the password and submit buttons and define those too, resulting in:

Now after adding our new connection component to the platform assigned to the onboarded test Shopizer administrator account we created, let's give it a whirl.
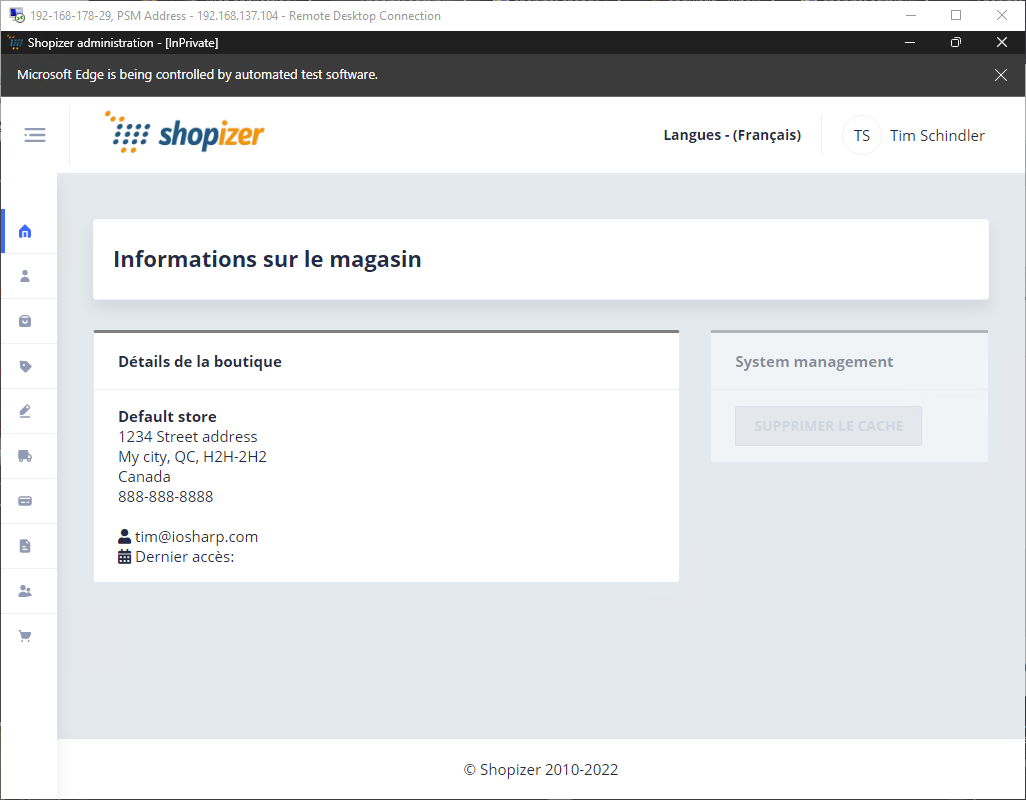
It's in French -- this seems to be the default language for Shopizer -- but it worked! We are logged into the Shopizer administrator portal.
Troubleshooting
Depending on the complexity of the web app, you may run into problems. With complex DOMs -- especially ones that involve iFrames -- it may not be straightforward when identifying elements.
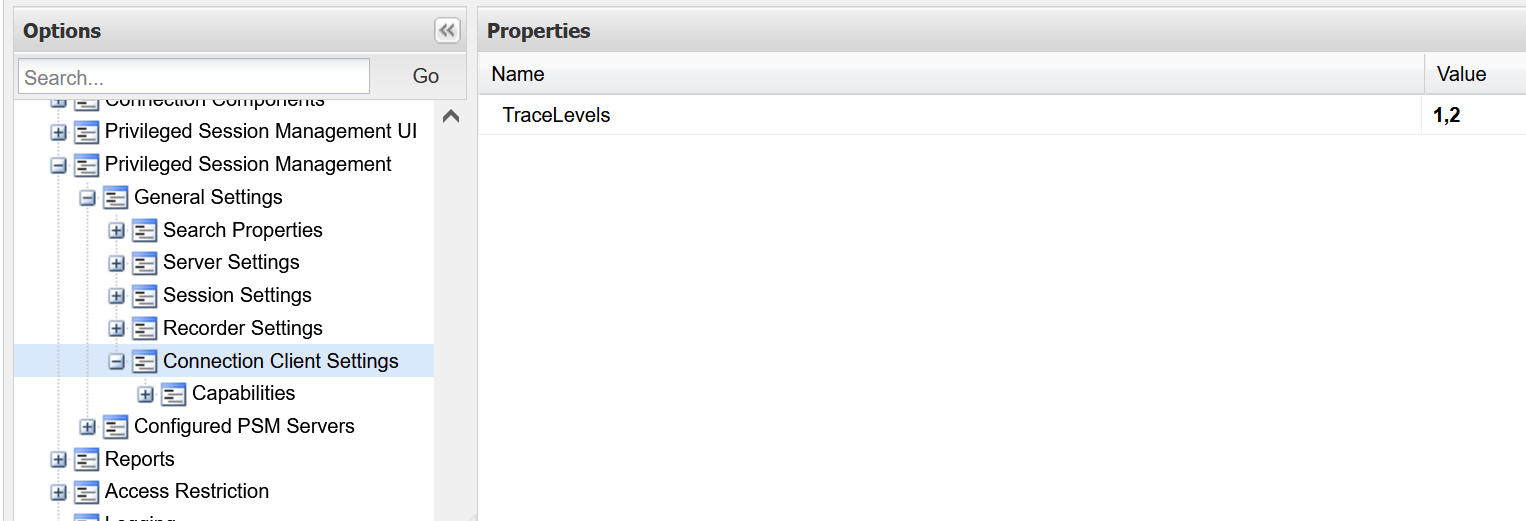
Thankfully, though not well documented at all, you can enable very verbose trace levels in <session id>.ClientDispatcher.log that are created in the Logs\Components\ folder. To do so, set TraceLevels=1,2 in the PVWA options under Privileged Session Management > General Settings > Client Connection Settings.
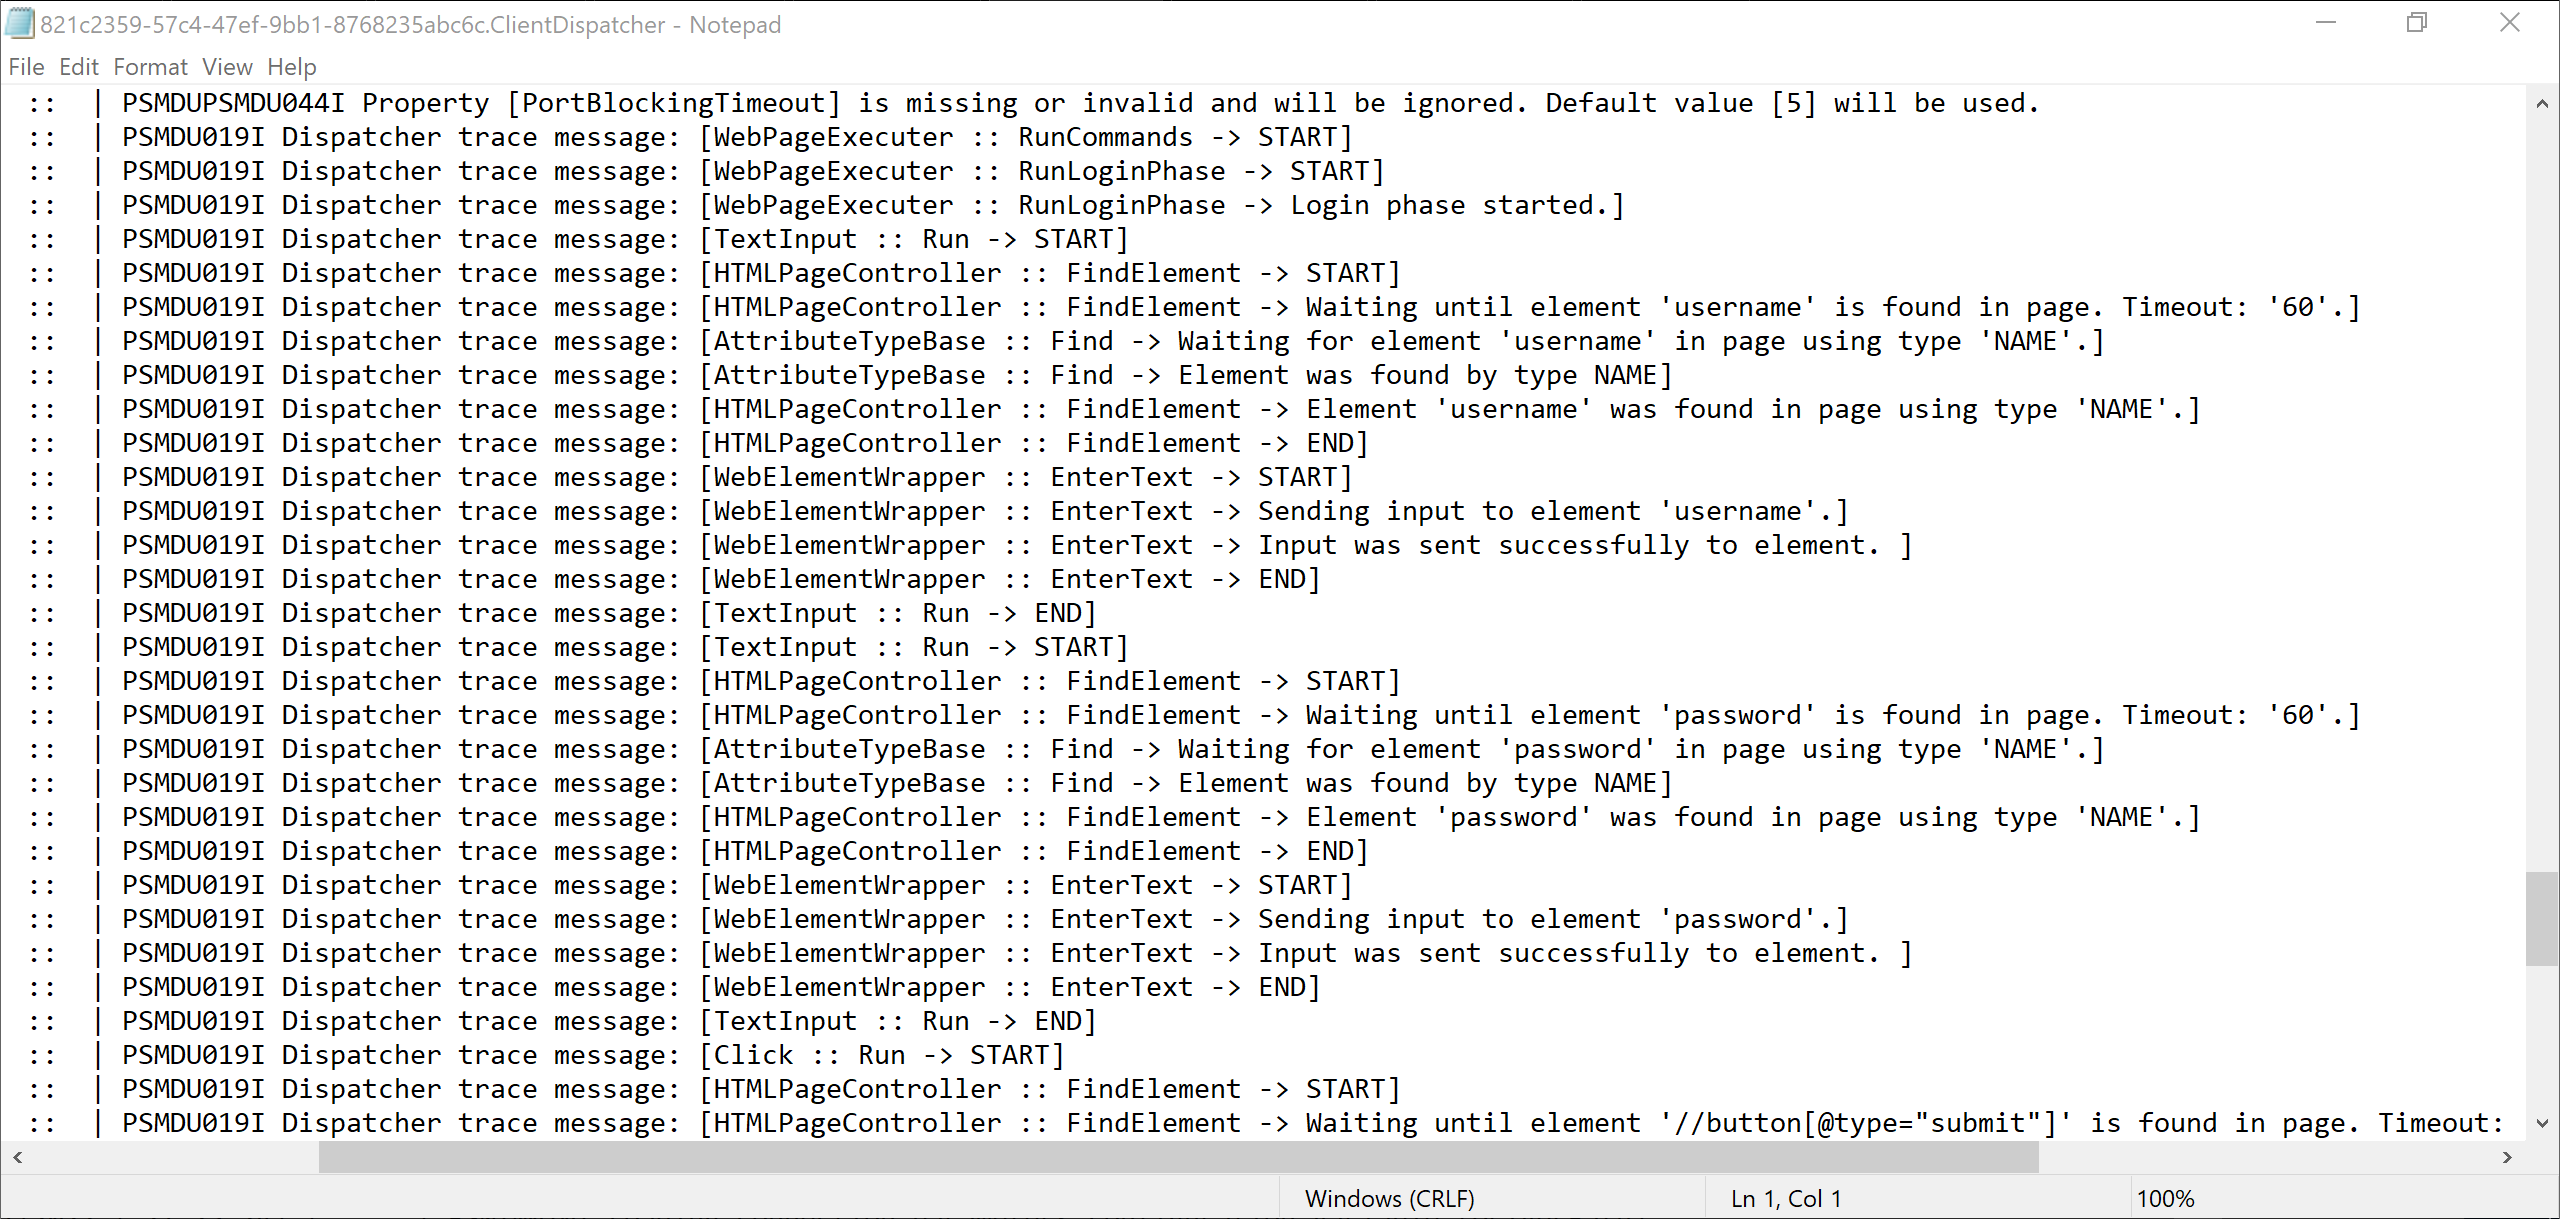
After a restart of the PSM service or waiting for the PVWA configuration refresh on the PSM, you will see the log file with helpful content such as:
Another helpful debugging 'tool' is setting EnableTrace to Yes. This shows the entire login process that the PSM obscures.
Improving our connection component
We developed our connection component 'quick and dirty' which is fine for a lab environment but nothing we would want to introduce into production. We have a lot of areas to improve on:
We should not hardcode the Port in the
LogonURL, rather allow this to be defined at the account level to handle the case where the Shopizer administrator portal is running on a port other than the default.We have no validations. After we login, we should use an element unique to a successfully-authenticated Shopizer administrator portal to inform the PSM the login was successful.
Similar to a validation of a successful login, we should set a validation for login failures. Like many applications, Shopizer returns an error message when a login was unsuccessful and we can use that element to clue the PSM into the fact that it failed.
With the above points addressed, the connection component moves closer to being production-ready and with our new knowledge of how a connection component for a web app works, we likely have a lot of the information we need to develop a CPM plugin for a web app, too.