Add dependent accounts in CyberArk with PACLI and PowerShell
CyberArk dependent accounts (or usages) are only accessible through the Classic UI and thus are not yet manageable through the CyberArk REST API. CyberArk in their epv-api-scripts repo on GitHub provide a script to onboard dependent accounts however as the script cleverly leverages the Add discovered accounts endpoint the scope is limited to just 'COM+ Application', 'IIS Anonymous Authentication', 'IIS Application Pool', 'Windows Scheduled Task', and 'Windows Service' types.
Being that dependent accounts are just another object in the Vault, we can script the onboarding of them using PACLI and PowerShell.
P.S.: If you are just interested in some PowerShell commandlets that enable you to easily add dependent accounts without knowing all the dirty details, check out the repository below.
A closer look at dependent accounts
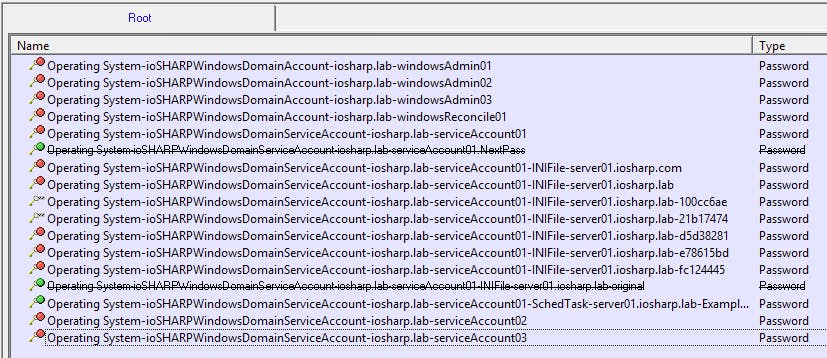
Looking in PrivateArk we can see that the dependent account and it’s primary account are separate accounts:
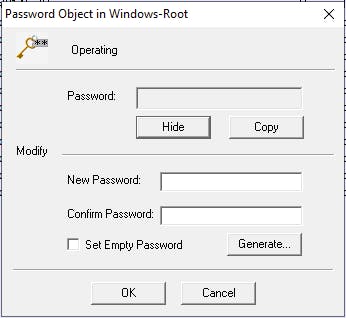
 And the dependent account has no password:
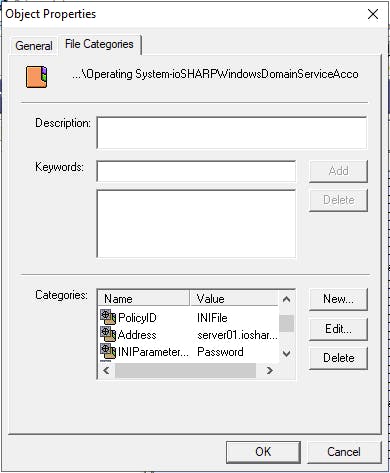
 They have file categories to that of a 'typical' account:
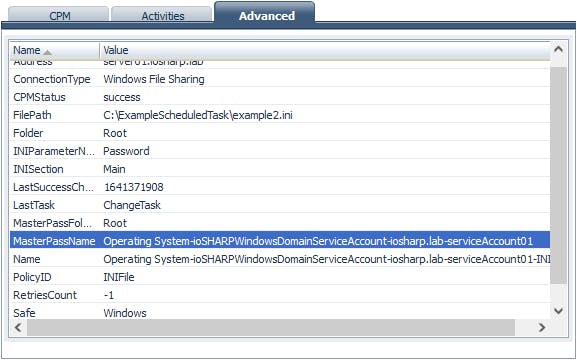
 With an important one that seems to link it to it's master account:
As dependent accounts are still accounts, we can onboard them in the Vault like we would any other -- we just need to define the correct file categories.
Creating a dependent account with PACLI and PowerShell
In actuality we do not need PowerShell at all when creating a dependent account. We just need PACLI.
However, I find working with PACLI using PoShPACLI an infinitely better experience as each PACLI command is represented as a PowerShell commandlet which provides a better quality of life with support for passing objects to the commandlets via the pipeline and auto-completion of parameters.
Looking in the Vault we know we need an object of the type Password and then define some 'generic' file categories and platform-specific categories. For the former we can use Add-PVPasswordObject and Add-PVFileCategory.
We first need to install and import PoShPACLI:
PS > Install-Module PoShPACLI
PS > Import-Module PoShPACLI
We need to define where the PACLI executable is that PoShPACLI will invoke when we execute a commandlet:
PS > Set-PVConfiguration C:\PACLI\Pacli.exe
Define the Vault we will connect to:
PS > New-PVVaultDefinition -Vault TestVault -address 192.168.0.50
And then connect to the Vault with a user that has the permissions needed to create an account in the safe our master account is and where our dependent account will live:
PS > Connect-PVVault -user Administrator -password ("Cyberark123" | ConvertTo-SecureString -Force -AsPlainText)
Similar to PrivateArk, we first need to open the safe we want to work with:
PS > Open-PVSafe -safe Windows
And from there we create the account as a Password object. The Safe and folder parameters are the most important ones as we can use anything for the file (name) and password parameters.
PS > Add-PVPasswordObject -file "exampleDependentAccount" -password ("dummy value" | ConvertTo-SecureString -Force -AsPlainText) -safe Windows -folder root
Lets define the generic categories to set the type of dependency it is, and the master account name and folder location of it within the same safe:
PS > Add-PVFileCategory -category PolicyId -value INIFile -safe Windows -folder Root -file exampleDependentAccount
PS > Add-PVFileCategory -category MasterPassName -value "Operating System-ioSHARPWindowsDomainServiceAccount-iosharp.lab-serviceAccount01" -safe Windows -folder Root -file exampleDependentAccount
PS > Add-PVFileCategory -category MasterPassFolder -value Root -safe Windows -folder Root -file exampleDependentAccount
At this point the categories we define next are dependent by the platform we defined. For the INI File, looking in the PVWA, we see five required properties:
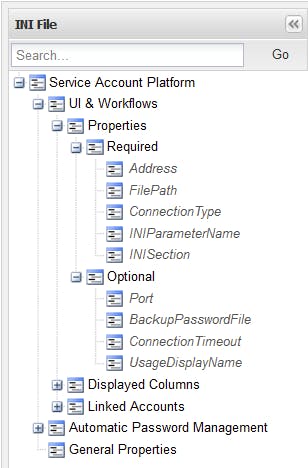
Let's stick with just whats required:
PS > Add-PVFileCategory -category address -value 'server01.iosharp.lab' -safe Windows -folder Root -file exampleDependentAccount
PS > Add-PVFileCategory -category FilePath -value 'C:\Example\example.ini' -safe Windows -folder Root -file exampleDependentAccount
PS > Add-PVFileCategory -category ConnectionType -value 'Windows File Sharing' -safe Windows -folder Root -file exampleDependentAccount
PS > Add-PVFileCategory -category INISection -value 'Main' -safe Windows -folder Root -file exampleDependentAccount
PS > Add-PVFileCategory -category INIParameterName -value 'Password' -safe Windows -folder Root -file exampleDependentAccount
With all the categories defined we can jump into the PVWA and see our new dependent account under the appropriate tab:
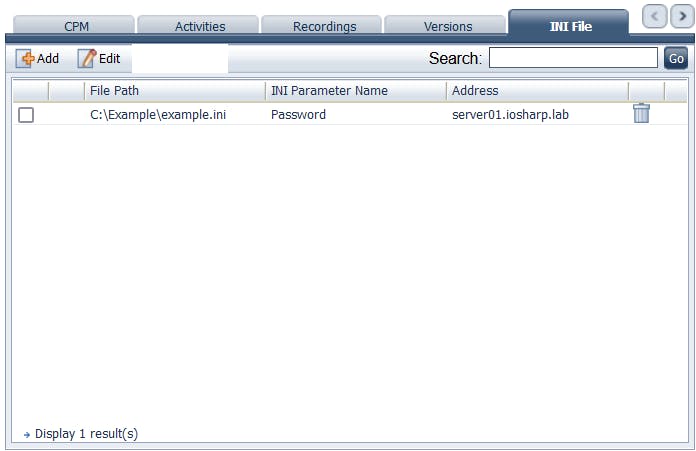
Selecting the dependent account and clicking Change, we can see that our INI file was updated successfully. If we incorrectly defined a category we can use the PVWA to adjust it (or stick with PowerShell and use Set-PVFileCategory):
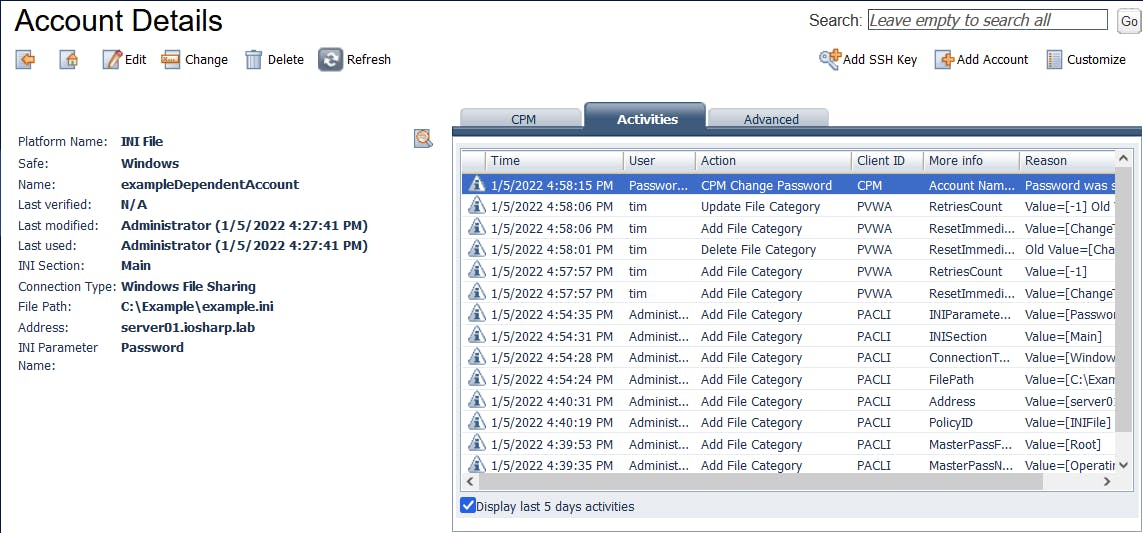
We only added a single dependent account but being that we used PoShPACLI and PowerShell we could quickly and with little effort add multiple.
Check out my Git repo below where I have created a commandlet for adding dependent accounts. They are made with similar parameters to PoShPACLI and psPAS so adoption is easy.


