

Application health checking and load balancing CyberArk Privileged Vault Web Access with HAProxy


The Privileged Vault Web Access is the most straightforward component to load balance in CyberArk's Privileged Access Security solution but despite this it is still easy to misconfigure one of the most important aspects: the health check.
It is possible to use whatever your load balancing solution's 'default' health check is but this typically leaves you with a health check that is server-based health check versus application-based. This could result in your load balancer still relaying traffic to a server where IIS is running but the PVWA service is not functional.
Whereas CyberArk provides documentation for other components on leveraging various endpoints to accomplish application-based health checks (Privileged Session Manager, Privileged Session Manager HTML5 Gateway), for the PVWA it offers only the most basic load balancing requirements.
Using HAProxy we will set up load balancing with a health check that evaluates the health of the PVWA service (our 'application') and not just IIS.
What is HAProxy?
From the official HAProxy website it is '... a free, very fast and reliable reverse-proxy offering high availability, load balancing, and proxying for TCP and HTTP-based applications.' It can meet the basic load balancing requirements for the PVWA and also the 'notable' load balancer settings found in this knowledge article. And just like the description implies we can use it to load balance in more complex scenarios like the load balancing PSMs.
Setting up HAProxy
Like most software HAProxy is provided as a Docker image. With Docker we can quickly get HAProxy up and running, passing our haproxy.cfg and TLS certificates in mounted volumes.
We will need a place to store our haproxy.cfg which configures HAProxy and a place to store our certificate and it's private key so lets first create those directories.
tim@docker01:~$ mkdir haproxy
tim@docker01:~$ mkdir haproxy/haproxy
tim@docker01:~$ mkdir haproxy/certificates
We will generate a self-signed certificate as this is a lab environment but in production we would want a certificate issued from a trusted certificate authority.
tim@docker01:~$ cd haproxy/certificates/
tim@docker01:~/haproxy/certificates$ openssl req -x509 -newkey rsa:4096 -keyout tls.pem.key -out tls.pem -sha256 -days 365 -nodes
Generating a RSA private key
..........++++
.......................++++
writing new private key to 'tls.pem.key'
-----
You are about to be asked to enter information that will be incorporated
into your certificate request.
What you are about to enter is what is called a Distinguished Name or a DN.
There are quite a few fields but you can leave some blank
For some fields there will be a default value,
If you enter '.', the field will be left blank.
-----
Country Name (2 letter code) [AU]:
State or Province Name (full name) [Some-State]:
Locality Name (eg, city) []:
Organization Name (eg, company) [Internet Widgits Pty Ltd]:
Organizational Unit Name (eg, section) []:
Common Name (e.g. server FQDN or YOUR name) []:192.168.0.115
Email Address []:
tim@docker01:~/haproxy/certificates$
With the file permissions and ownership the private key is created with the HAProxy process inside the container will not be able to read it. We will change the file to be owned by the user ID the HAProxy runs as inside the container.
tim@docker01:~/haproxy/certificates$ chown 99 tls.pem.key
Creating our haproxy.cfg
In a haproxy.cfg you will see two primary sections: one to represent the frontend and one to represent the backend.
In the frontend section, we specify settings around HAProxy receiving traffic. This includes configurations like the addresses and ports HAProxy is listening for traffic on, the TLS certificate used to secure communication between HAProxy and the client, as well as options to redirect HTTP traffic to HTTPS.
In the backend section, we specify the servers HAProxy will relay traffic to as well as options like load balancing strategy, more sophisticated health checking, and persistent sessions.
We will start with something simple just to ensure it works:
tim@docker01:~/haproxy/haproxy$
tim@docker01:~/haproxy/haproxy$ vi haproxy.cfg
with the content
frontend pvwa_loadbalancer
  bind *:443 ssl crt /usr/local/etc/certs/tls.pem
  default_backend pvwas

backend pvwas
  server pvwa1 192.168.0.102:443 ssl verify none
  server pvwa2 192.168.0.116:443 ssl verify none
Our haproxy.cfg is extremely basic. We define a frontend to listen on port 443 and tell it to use the certificate we generated earlier (we can just define the certificate and HAProxy will look for a private key with the name <certificate filename>.key in the same directory, which in our case is named tls.pem.key.) With default_backend we define the name of the backend that traffic coming from the frontend should be relayed to.
In the backend section we define the individual servers traffic will be relayed to. The names pvwa1 and pvwa2 for the servers are arbitrary and we can call them whatever we want but the backend must be named pvwas as we used it as the value for the default_backend in the frontend. After specifying the address and IP of the server we state to connect with ssl and again because this is a lab environment we allow for invalid TLS certificates on the backend PVWA servers with verify none.
With our certificates generated and our initial haproxy.cfg we can start our container, making sure to mount the local volumes.
tim@docker01:~/haproxy$ sudo docker run -p 443:443 -v /home/tim/haproxy/haproxy:/usr/local/etc/haproxy:ro -v /home/tim/haproxy/certificates:/usr/local/etc/certs:ro haproxy:latest
[NOTICE]   (1) : haproxy version is 2.5.1-86b093a
[NOTICE]   (1) : path to executable is /usr/local/sbin/haproxy
[WARNING]  (1) : config : missing timeouts for frontend 'pvwa_loadbalancer'.
   | While not properly invalid, you will certainly encounter various problems
   | with such a configuration. To fix this, please ensure that all following
   | timeouts are set to a non-zero value: 'client', 'connect', 'server'.
[WARNING]  (1) : config : missing timeouts for backend 'pvwas'.
   | While not properly invalid, you will certainly encounter various problems
   | with such a configuration. To fix this, please ensure that all following
   | timeouts are set to a non-zero value: 'client', 'connect', 'server'.
[NOTICE]   (1) : New worker (8) forked
[NOTICE]   (1) : Loading success.
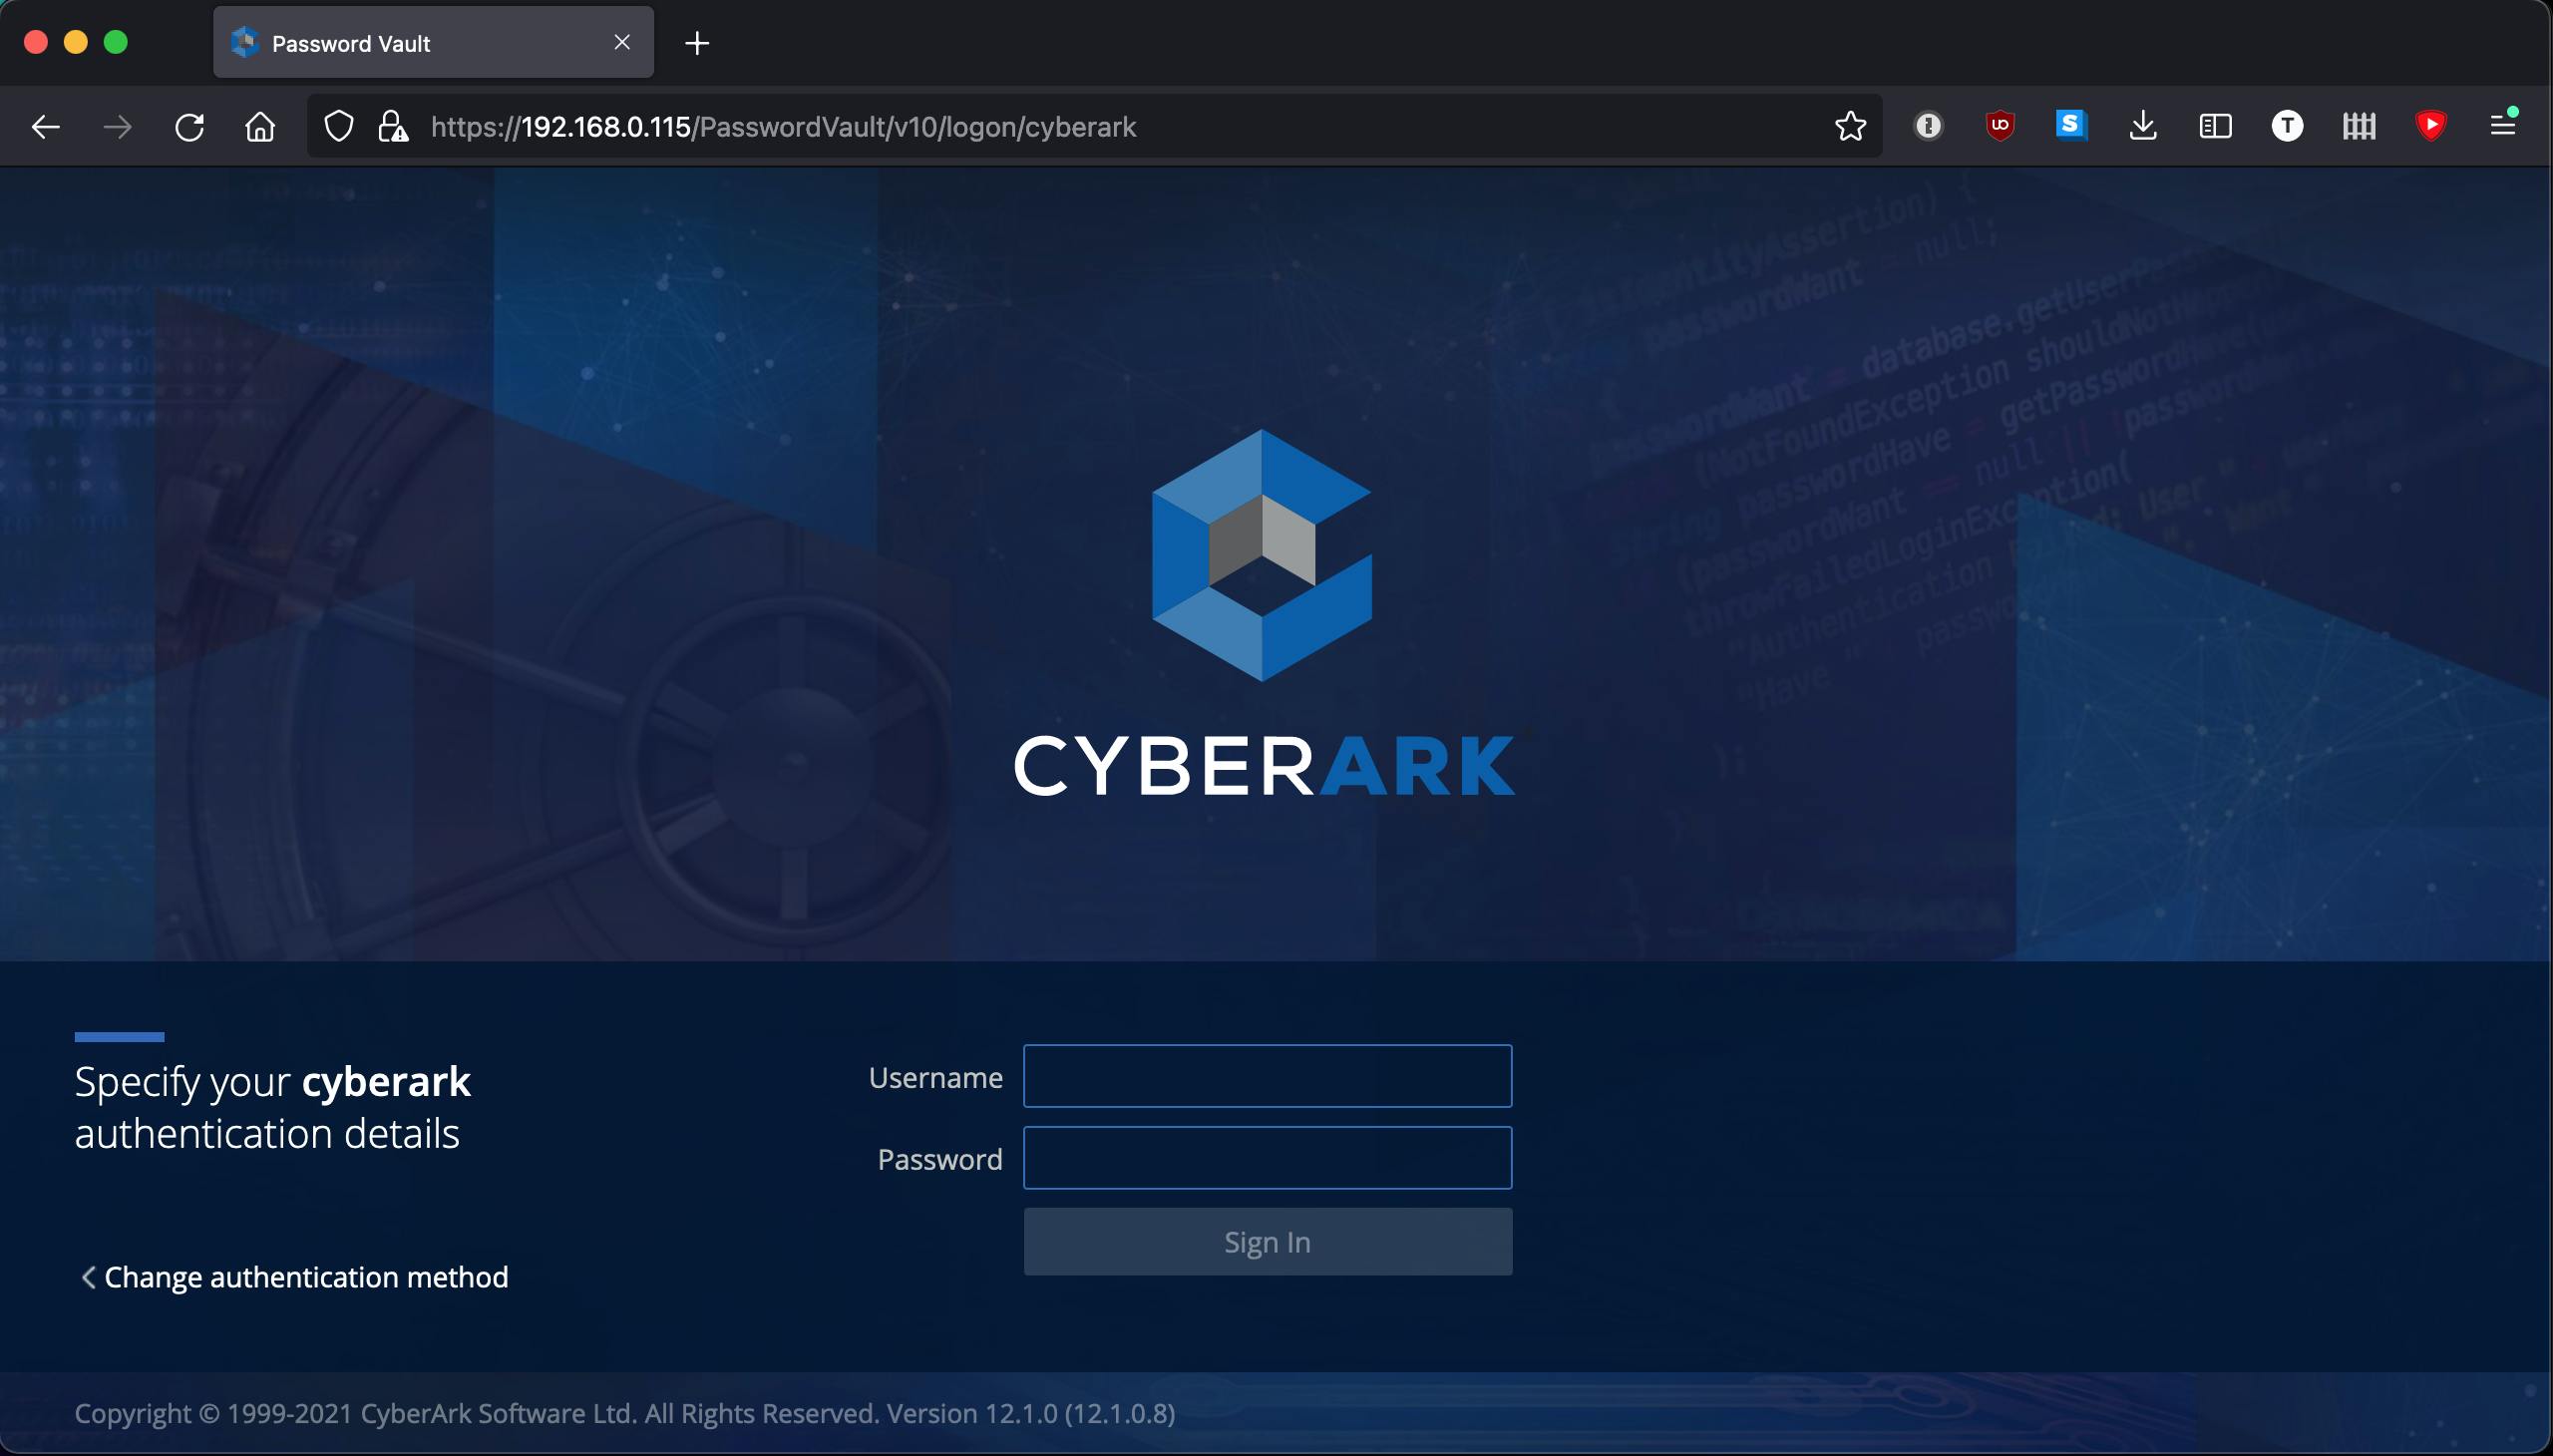
Starting the container we see a few warnings about the lack of timeouts but navigating to the PVWA through our load balancer it loads!
But after logging in we immediately get an error about our session expiring.
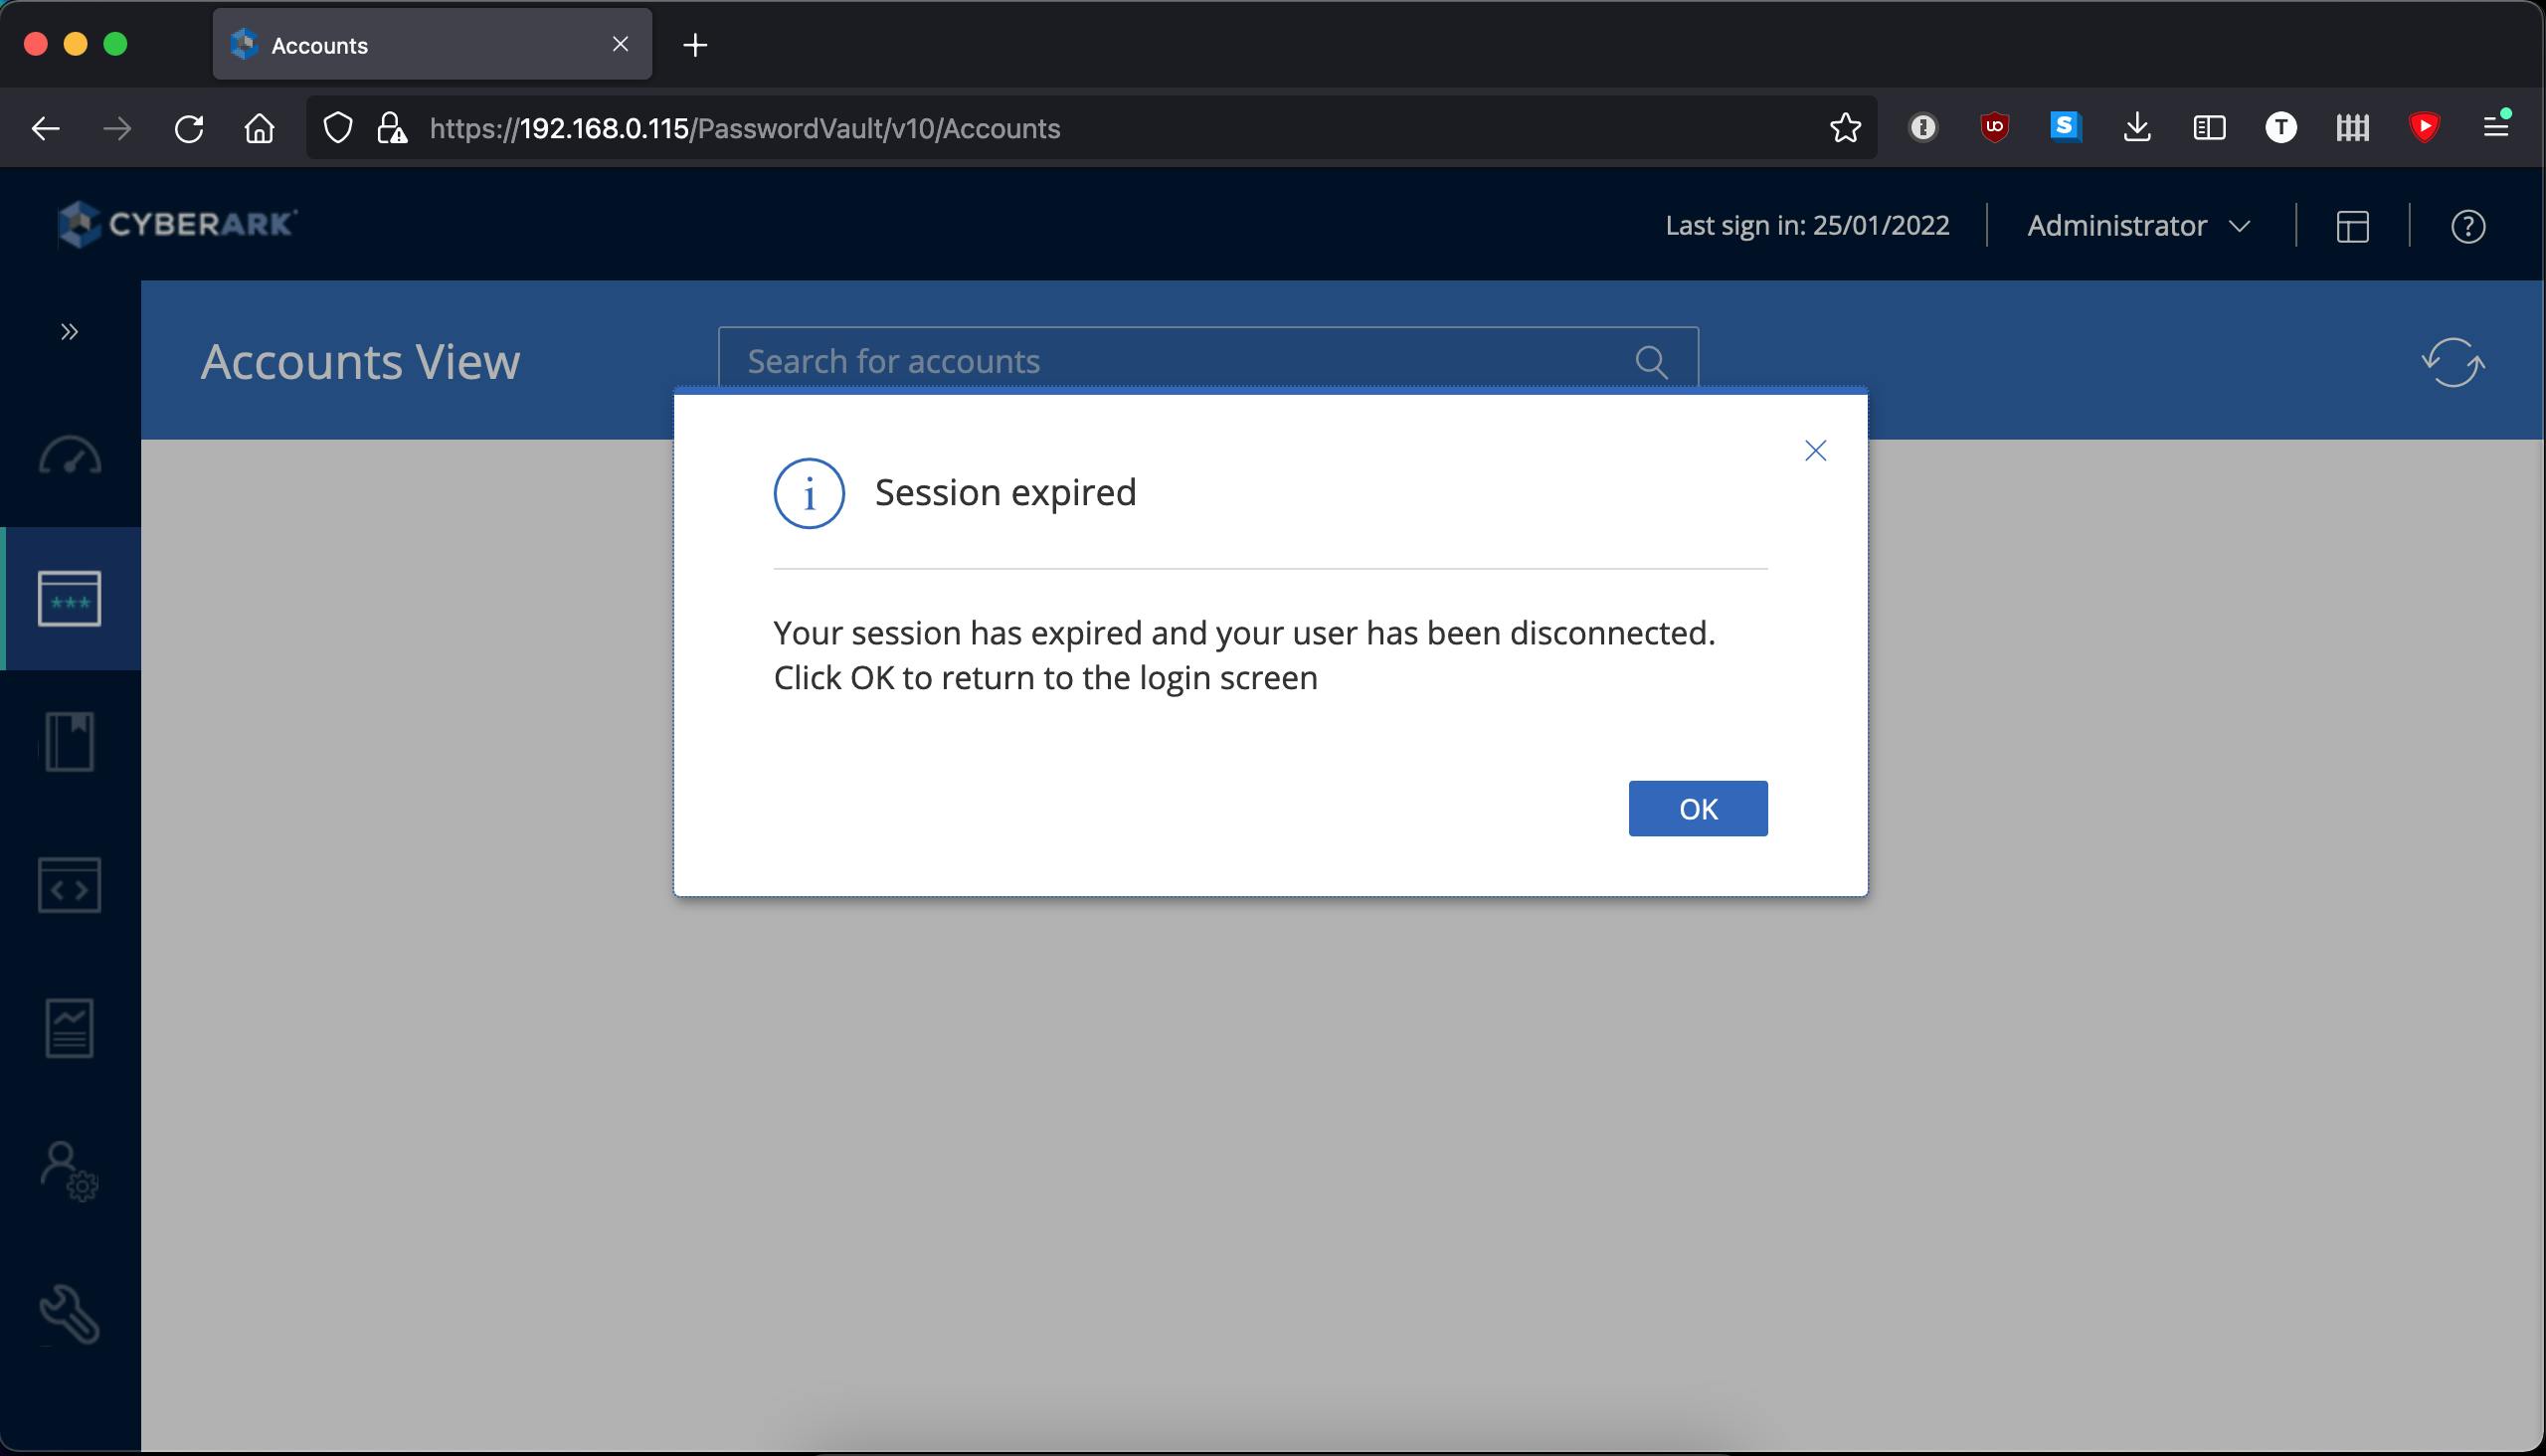
Our basic haproxy.cfg is a bit too basic. There is no sticky sessions and we do not have a load balancing method configured so HAProxy is rotating through the PVWAs, sending the next request to the next server. Plus: we do not have ANY health checking, let alone something that could be considered an application-based health check.
Adding sticky sessions and application health checking
We can add basic health checks by simply adding the check keyword to each of servers defined in the backend section but this alone will not check the health of the PVWA rather just of IIS. We need to also add the option httpchk keyword to our backend section.
option httpchk allows us to define a URI. It will make a request to that URI and if the response returns a HTTP code of 2xx or 3xx then HAProxy considers the server healthy.
As we want HAProxy to not relay traffic to a PVWA where the PVWA service is not working or cannot connect to the Vault even though IIS is running, we need to find the right URI that will return something that is NOT 2xx or 3xx under those conditions. To find this, lets start with looking at requests made in Firefox when we browse to a functional PVWA with the idea that one or more return should something other than 2xx or 3xx when something is wrong with the PVWA.
Finding a URI for our health check
Lets approach it how a customer would by browsing directly to one of the PVWAs in Firefox. With the Network Monitor tab in focus of Web Developer tools open and filtering on just HTTP and XHR type of requests we navigate to one of the PVWAs:
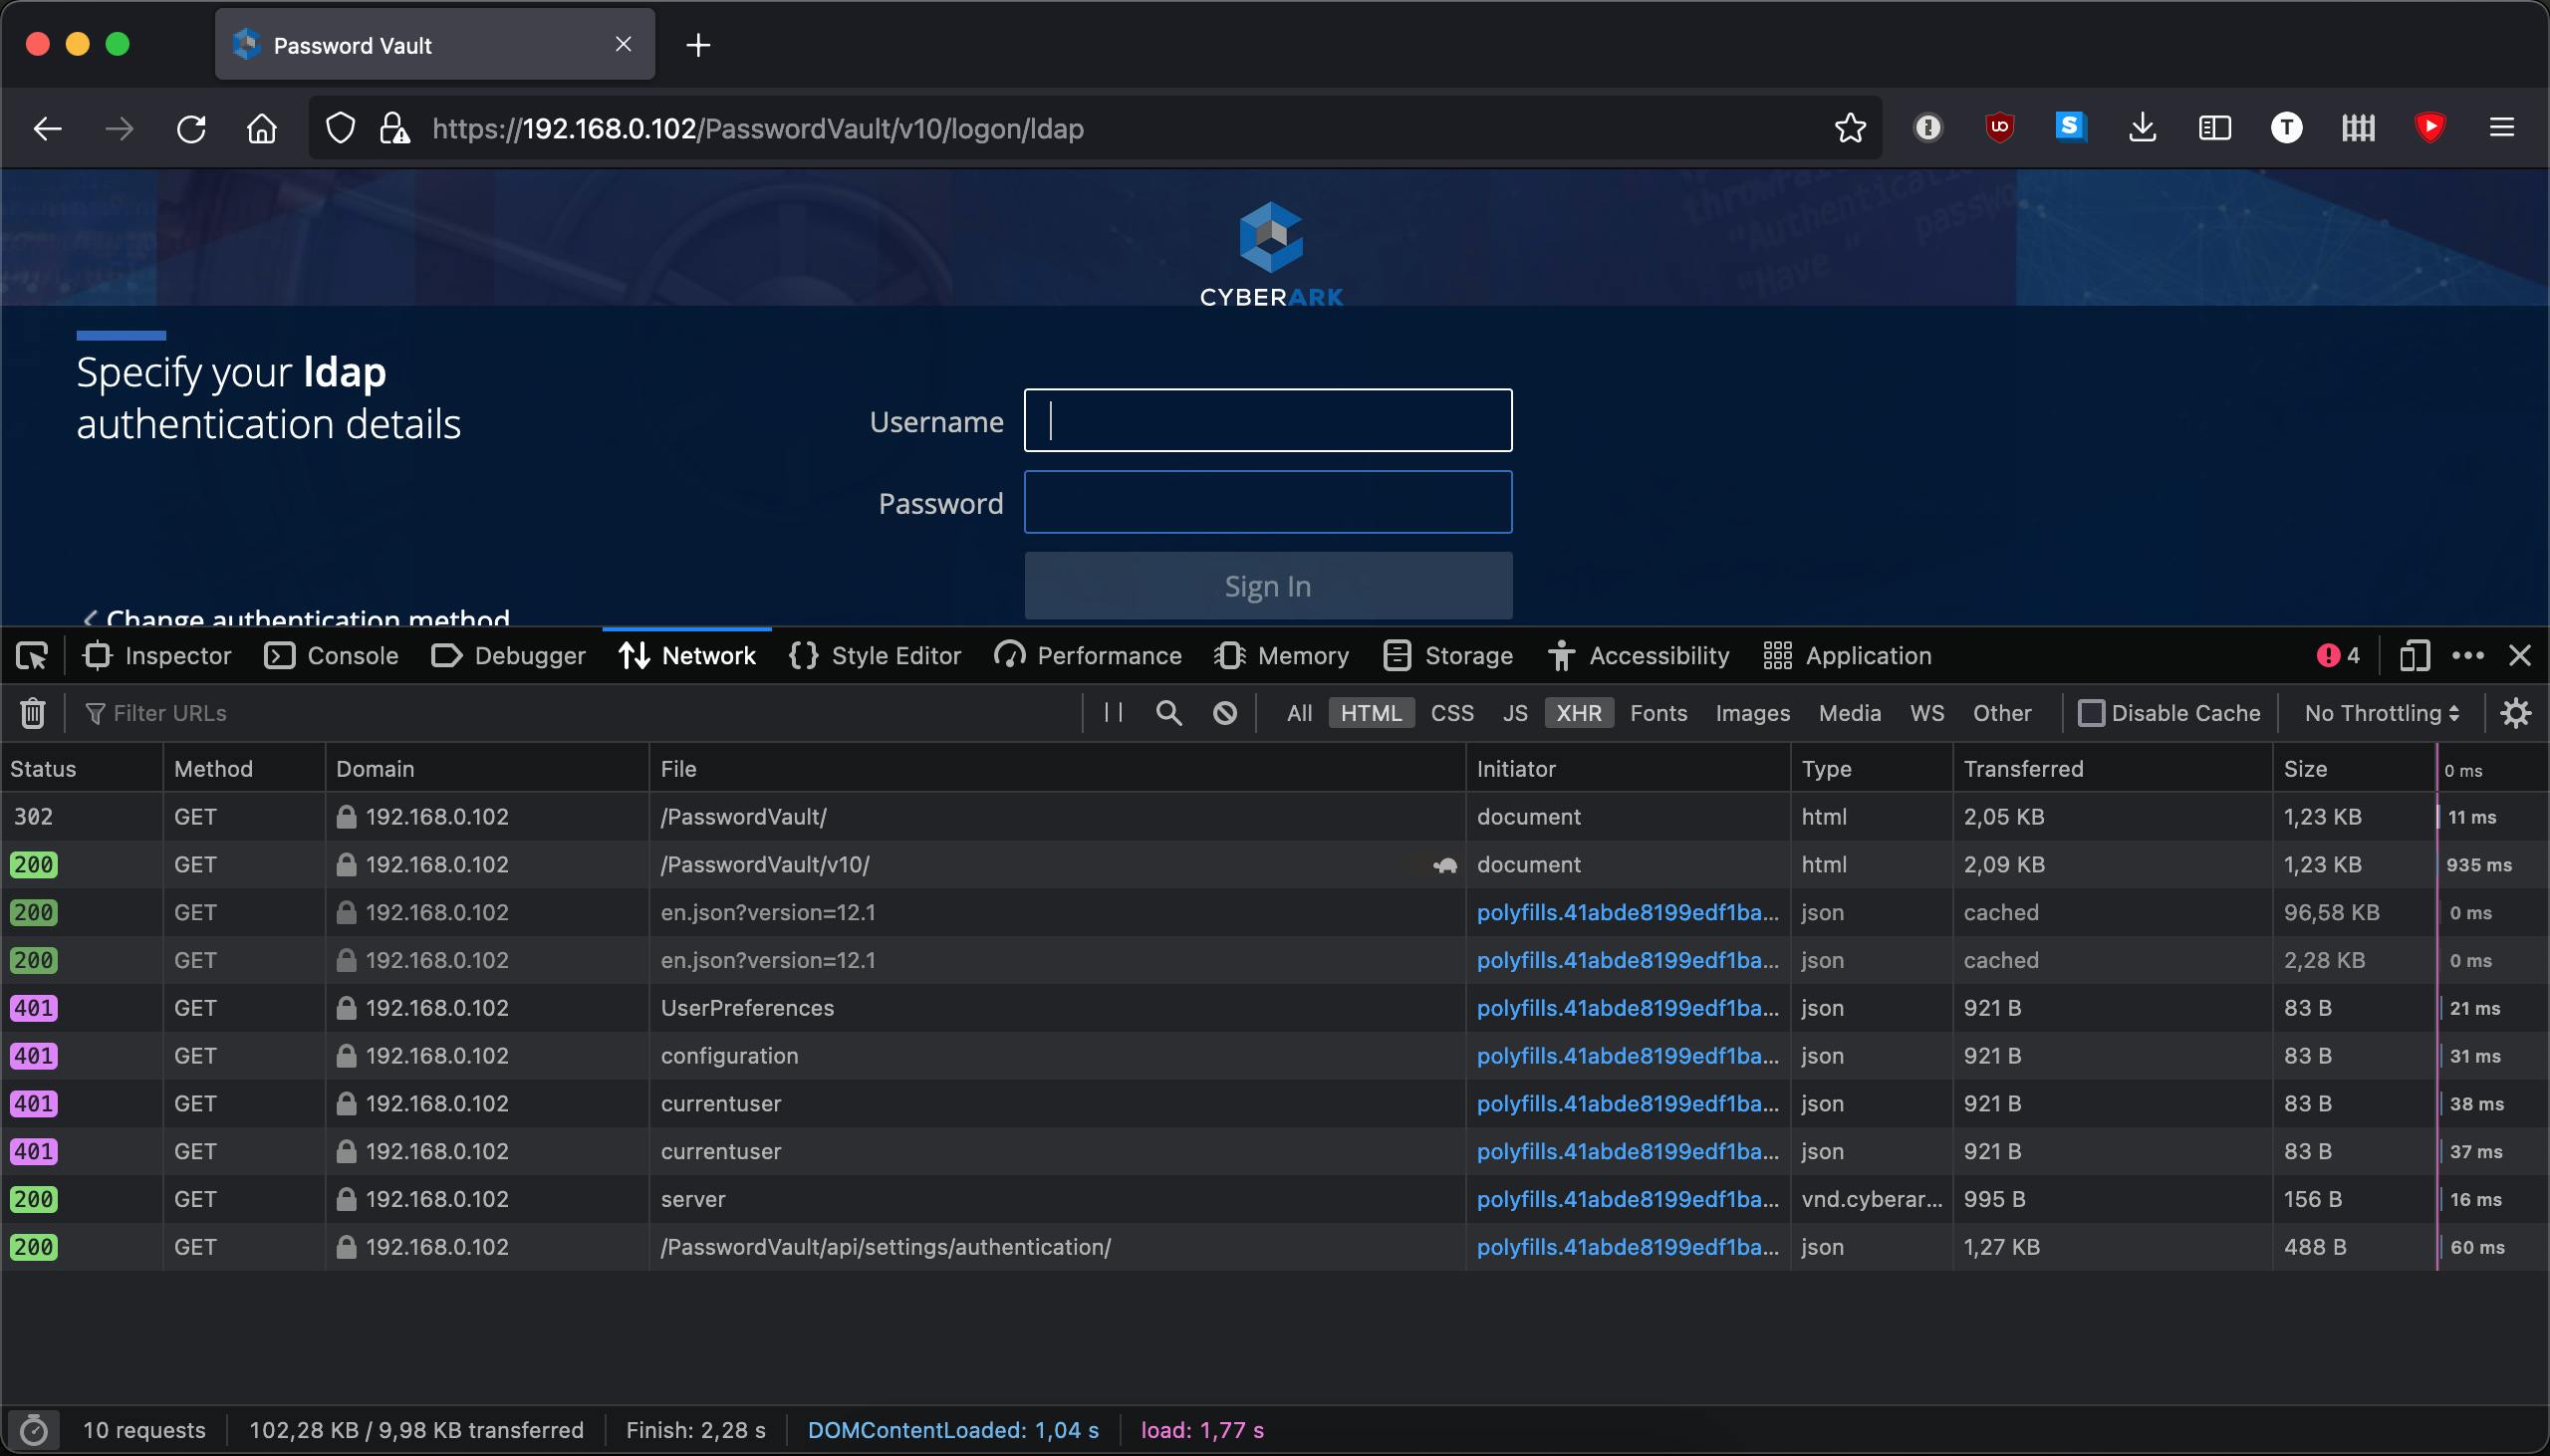
Looking at all the requests we want to focus on the ones that return 200. In theory all of these would be suitable for the health check but it could be that 200 is still returned even though the PVWA is not working. We should purposely break the PVWA and see what is returned then.
Lets use the Windows Firewall and create a rule on the PVWA blocking outbound traffic on port 1858:
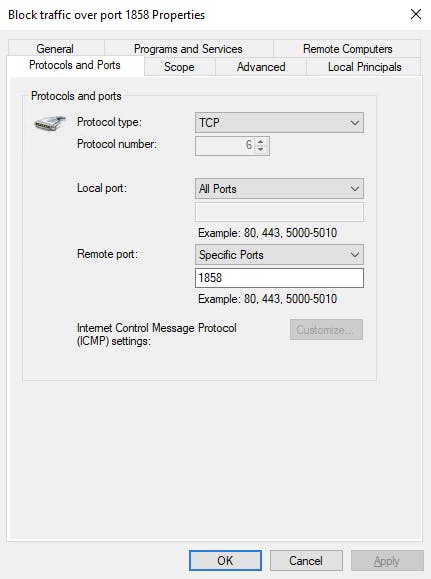
Ensuring that our rule is enabled we refresh the PVWA:
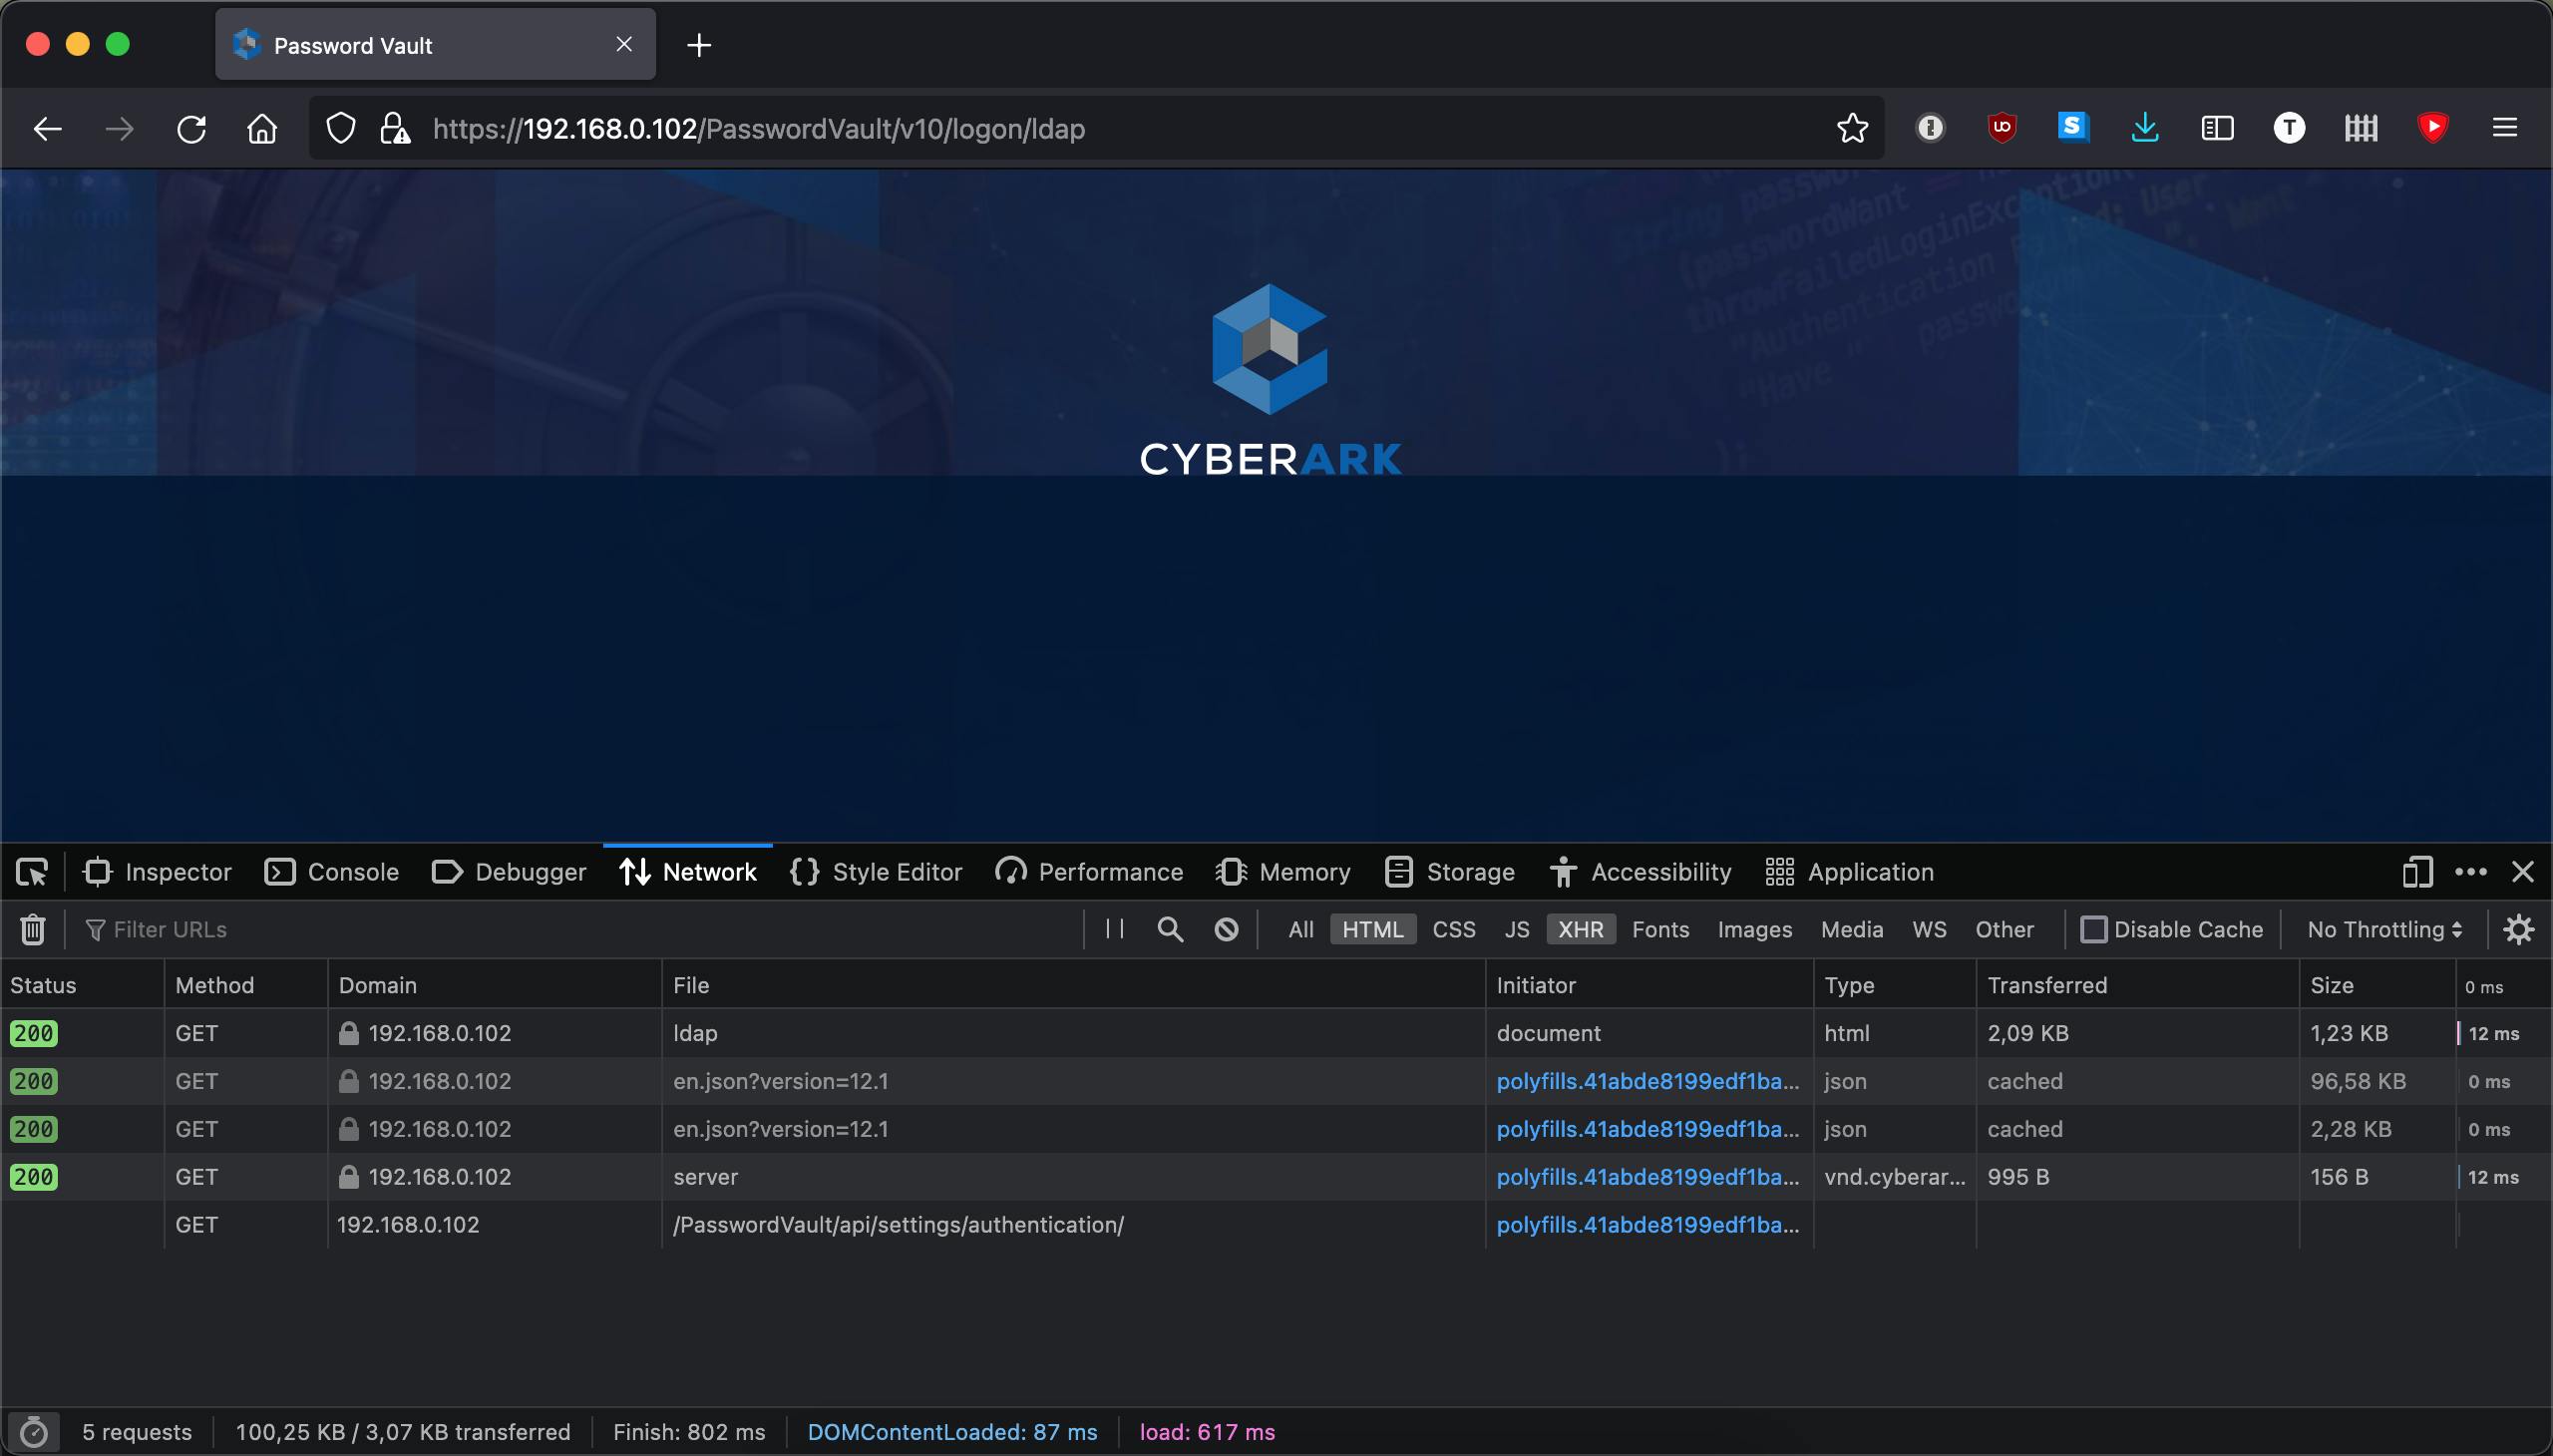
Even without a connection to the Vault the PVWA still loads -- sort of. In a non-functioning state IIS still returned a 200 for the first few requests which loaded the logon screen minus the fields to put in credentials. The request to https://192.168.0.102/PasswordVault/api/settings/authentication failed, however, so it seems like a perfect candidate to use for our health check.
Lets add it as part of a option httpchk in our backend in haproxy.cfg while at the same time adding values for the timeout configurations we saw warnings for when starting HAProxy the first time:
defaults
  timeout client 10s
  timeout connect 10s
  timeout server 10s

frontend pvwa_loadbalancer
  bind *:443 ssl crt /usr/local/etc/certs/tls.pem
  default_backend pvwas

backend pvwas
  option httpchk GET /PasswordVault/api/settings/authentication
  server pvwa1 192.168.0.102:443 check ssl verify none
  server pvwa2 192.168.0.116:443 check ssl verify none
In addition we had to add the check keyword to each of the servers in our backend that we want it's health checked. We need this otherwise our option httpchk is effectively worthless.
Sticky sessions
Sticky sessions can be accomplished a multitude of ways including via cookies or with hashing-based methods. We will use stick tables.
We will use a stick table to capture the information of client IP addresses and associate it to a backend server. Every time a client IP address connects HAProxy will look in the stick table to see the previously-associated server and relay the traffic to it. We also set a time for this association to expire so a client is not eternally 'stuck' with a particular server.
defaults
  timeout client 10s
  timeout connect 10s
  timeout server 10s

frontend pvwa_loadbalancer
  bind *:443 ssl crt /usr/local/etc/certs/tls.pem
  default_backend pvwas

backend pvwas
  stick-table type ip size 1m expire 15m
  stick on src
  option httpchk GET /PasswordVault/settings/authentication
  server pvwa1 192.168.0.102:443 check ssl verify none
  server pvwa2 192.168.0.116:443 check ssl verify none
Finishing it off with stats
HAProxy provides a convenient stats page that we can use to see numerous information for our frontends and backends, among that the health of the servers in the backend. As a last act before we start our container with our new haproxy.cfg lets add a frontend for the stats page.
defaults
  timeout client 10s
  timeout connect 10s
  timeout server 10s

frontend pvwa_loadbalancer
  bind *:443 ssl crt /usr/local/etc/certs/tls.pem
  default_backend pvwas

backend pvwas
  option httpchk GET /PasswordVault/api/settings/authentication
  server pvwa1 192.168.0.102:443 check ssl verify none
  server pvwa2 192.168.0.116:443 check ssl verify none

frontend stats
  mode http
  bind *:8404
  stats enable
  stats uri /stats
  stats refresh 10s
  stats admin if TRUE
We run the stats page on it's own frontend. It will auto refresh every 10 seconds and because we are still in a lab environment we use the stats admin to always return TRUE (if we want this production we should protect it with at least basic authentication like shown in the HAProxy examples) so we can perform administrative tasks like disabling health checks on servers or the entire backend, marking individual servers as healthy or unhealthy.
We also need to remember to publish the port for our stats page when we start our container.
Running and testing our new haproxy.cfg
First we start our container like in the beginning but with the port 8404 published for our stats page:
docker run -p 443:443 -p 8404:8404 -v /home/tim/haproxy/haproxy:/usr/local/etc/haproxy:ro -v /home/tim/haproxy/certificates:/usr/local/etc/certs:ro haproxy:latest
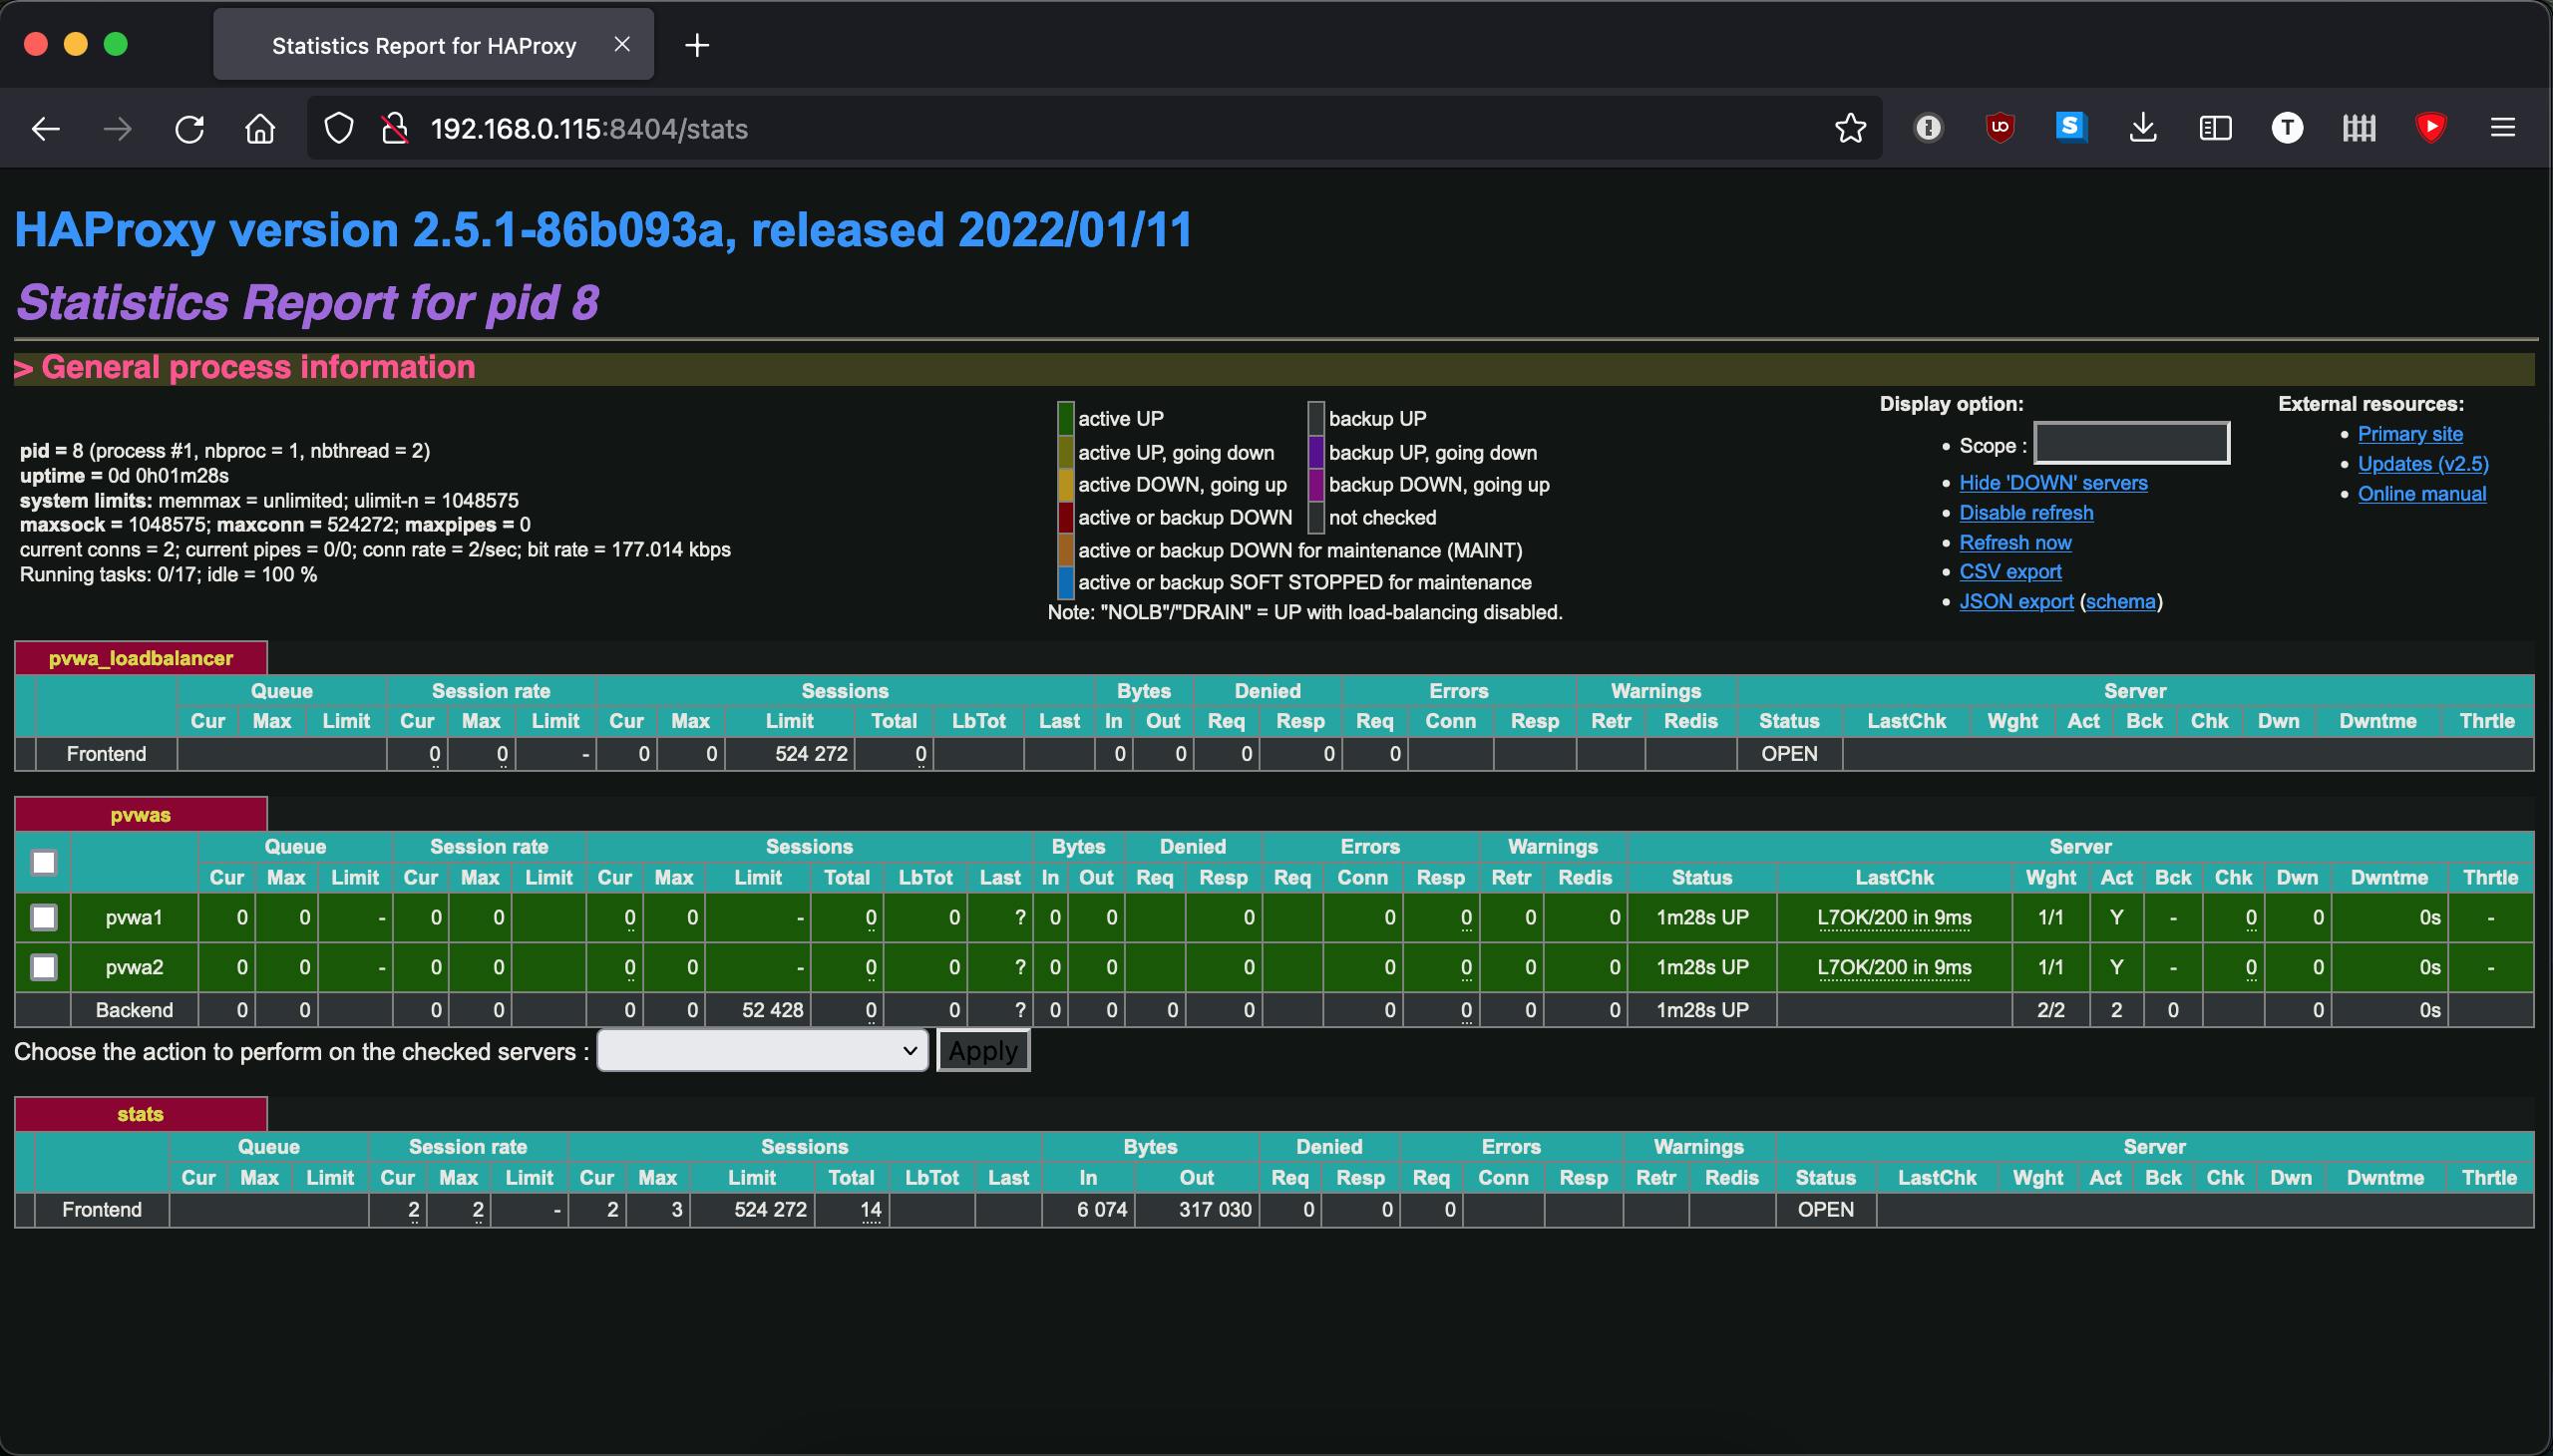
When we load the stats page we can see both the frontends and the backend we defined along with various statistics about them. On our backend we are able to administrator the individual servers or the backend as a whole:
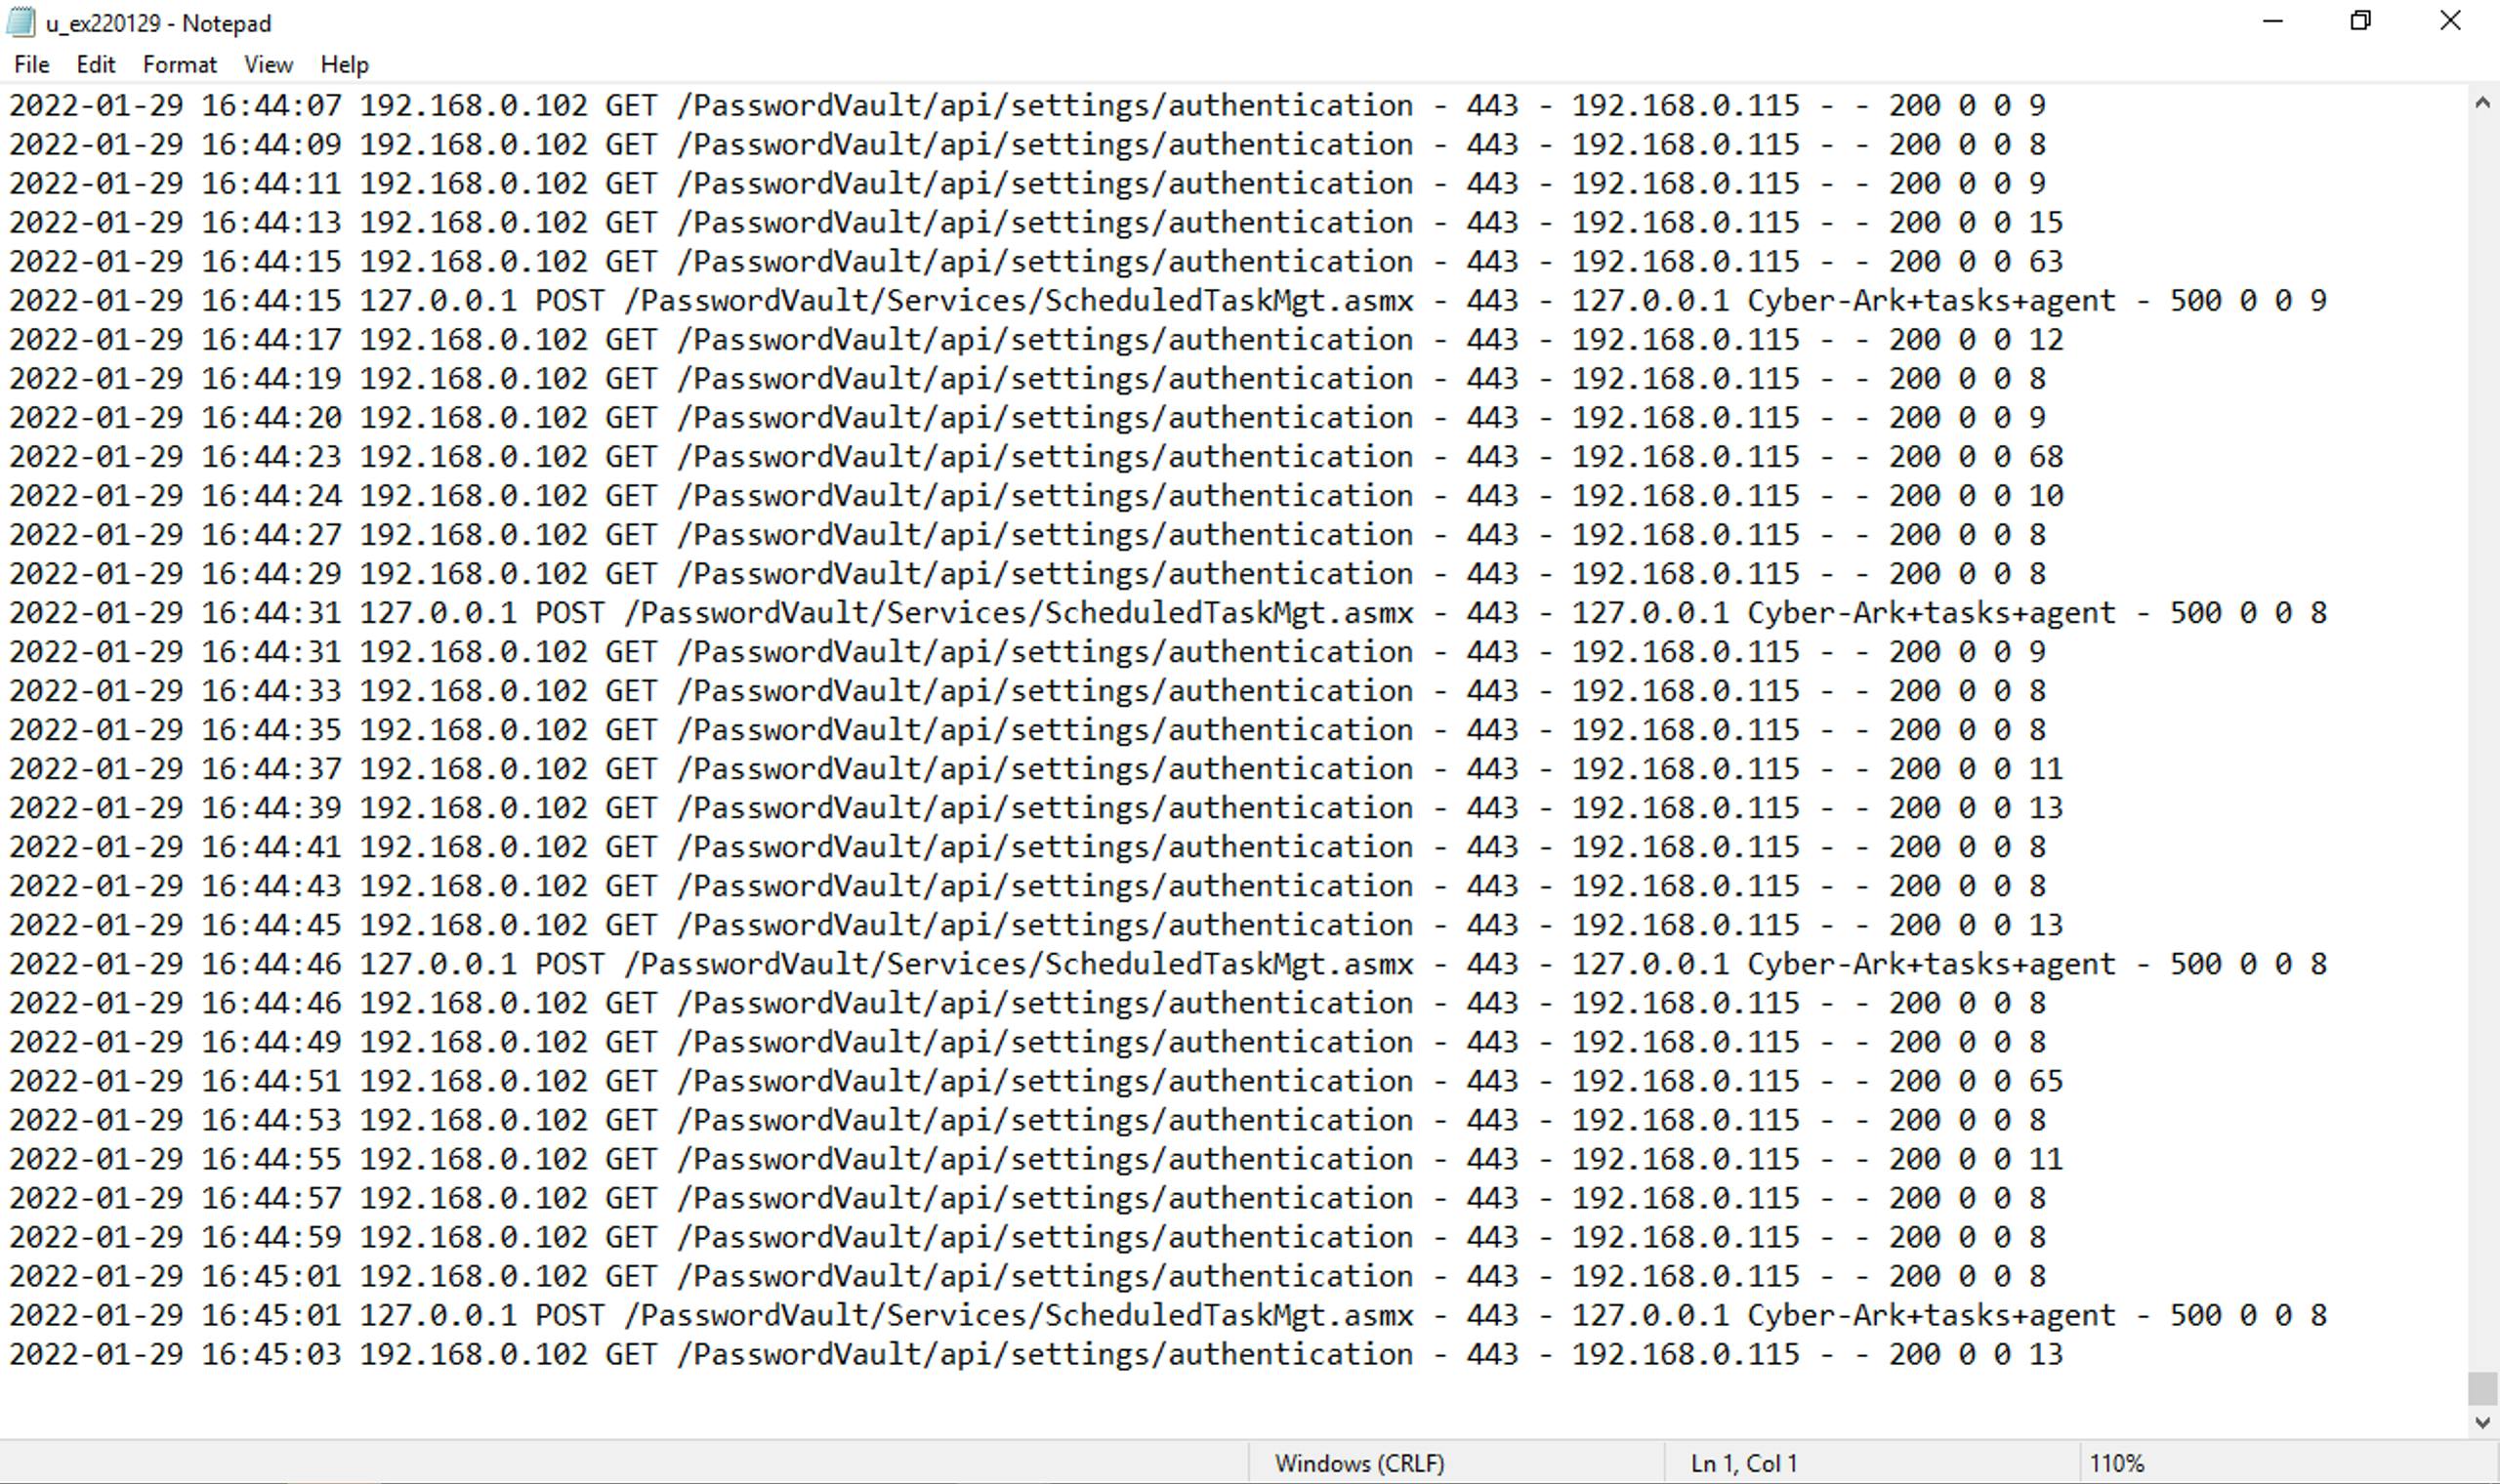
Looking at one of the PVWAs we can observe the IIS logs to see the health check:
Stopping the IIS service or re-enabling the Windows Firewall rule we create to simulate the inability for the PVWA to connect to the Vault, the server in the backend goes red in our stats page and traffic is no longer relayed to it:

Going forward
With a simple configuration we have a powerful load balancer with an application-based health check. We can effortlessly add more functionality like the X-Forwarded-For header using the option forwardfor keyword to capture the real client IP address when accessing the PVWA behind our load balancer, HTTP to HTTPS auto redirection with redirect scheme, and defining a load balance method with the balance method.
As HAProxy is a Layer 4 load balancer it is not limited to just HTTP use cases. It can be used to load balance Privileged Session Manager and Privileged Session Manager for SSH.